
Table of Contents
When we think of Video Editing software, we usually think of products like Adobe Premiere or Final Cut. However, the software landscape is full of products that offer great functionalities and performance levels at a fraction of the price of the two market leaders above.
In this article, we'll review one of them, TunesKit AceMovi Video Editor - a fully-fledged video editing software for Windows and Mac that offers everything we need for our basic and advanced video editing features: from the basic tools (recorder, cutter, rotate) to more complex video effects (filters, animations, transitions, text overlays), as well as templates, resources, effects, and much more.
Download and install
The software can be downloaded from the TunesKit official website, or directly from the sub-section dedicated to TunesKit AceMovi Video Editor: just click to the Try It Free button to download a free evaluation copy, which can be used to try the software to its full extent - with some minor limitations that we'll explain later on. Once the download is done we can click to the executable to install the software, following the typical Wizard-like installation process.
Main Dashboard
After the installation process is over, the software will automatically start, bringing us to the main dashboard.
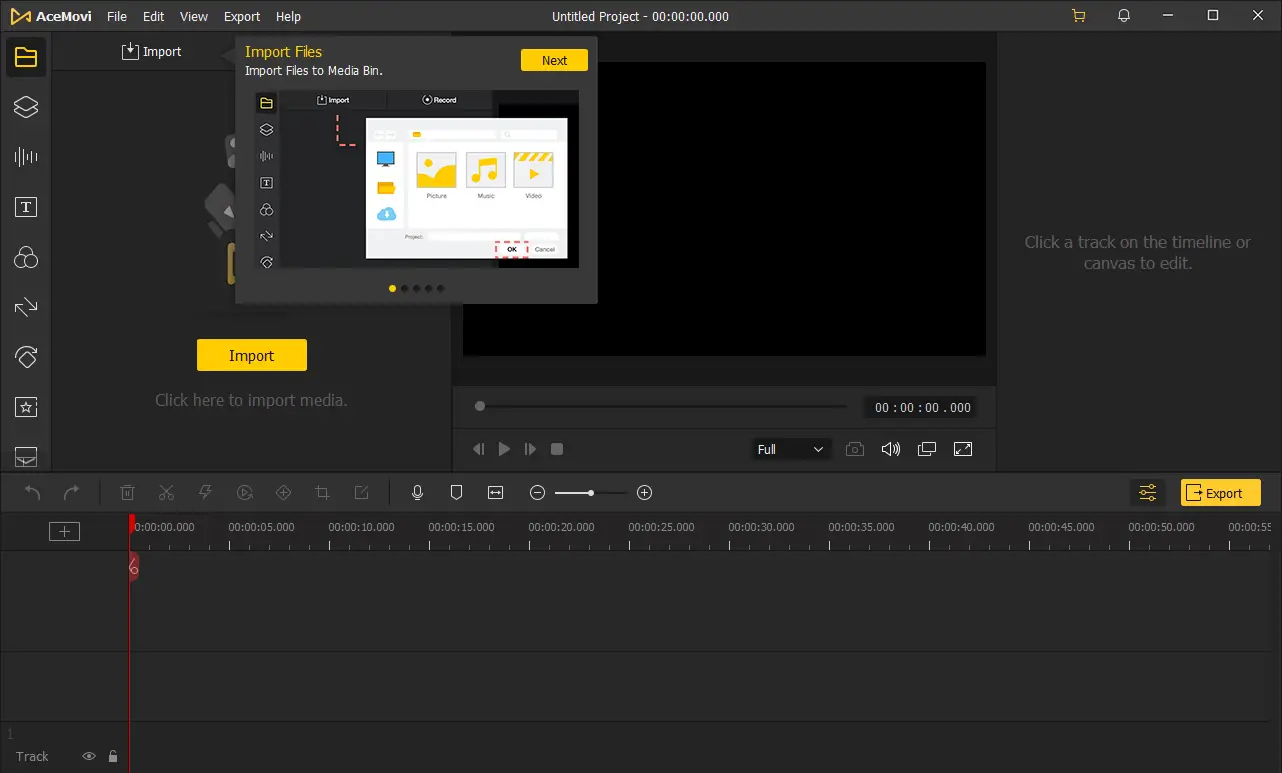
As we can see by looking at the above screenshot, there is also a neat quickstart guide that explains how the software works through a number of help messages: if we spend some valuable time browsing through them (using the Next button), we can learn how the whole interface works in less than a minutes; we strongly suggest to do that.
The quick start guide enumerates the following five main steps that we should follow to edit our videos:
- Import the source media to the "Media Bin", a local repository that will be used to host everything we need to build our final product. The Media Bin window is placed in the top-left part of the screen, together with a practical icon-based menu that can be used to switch between the other software's libraries (transitions, effects, filters, overlays, and the likes).
- Drag the imported media to the timeline, so that we can work with it. The timeline is placed at the bottom of the screen.
- Perform the actual editing tasks using the tools and effects provided by the software. The editing process takes place in the timeline, where we will "drag and drop" the various video sources and effects from the top-left libraries. Each "item" can be configured using its own set of settings, that will appear in the right-top part of the screen when we select it.
- Preview the outcome using the real-time preview window before exporting it. The preview window is placed at the top center of the screen.
- Export the outcome to a finalized video file, selecting the resolution, audio & video codec, and several other settings.
As we can easily understand, the most important part of the above process is the third bullet point: the editing phase, where AceMovi really shines.
Editing Video Clips
In the following screenshot we can see how this phase actually works, with a timeline filled with three different video sources:
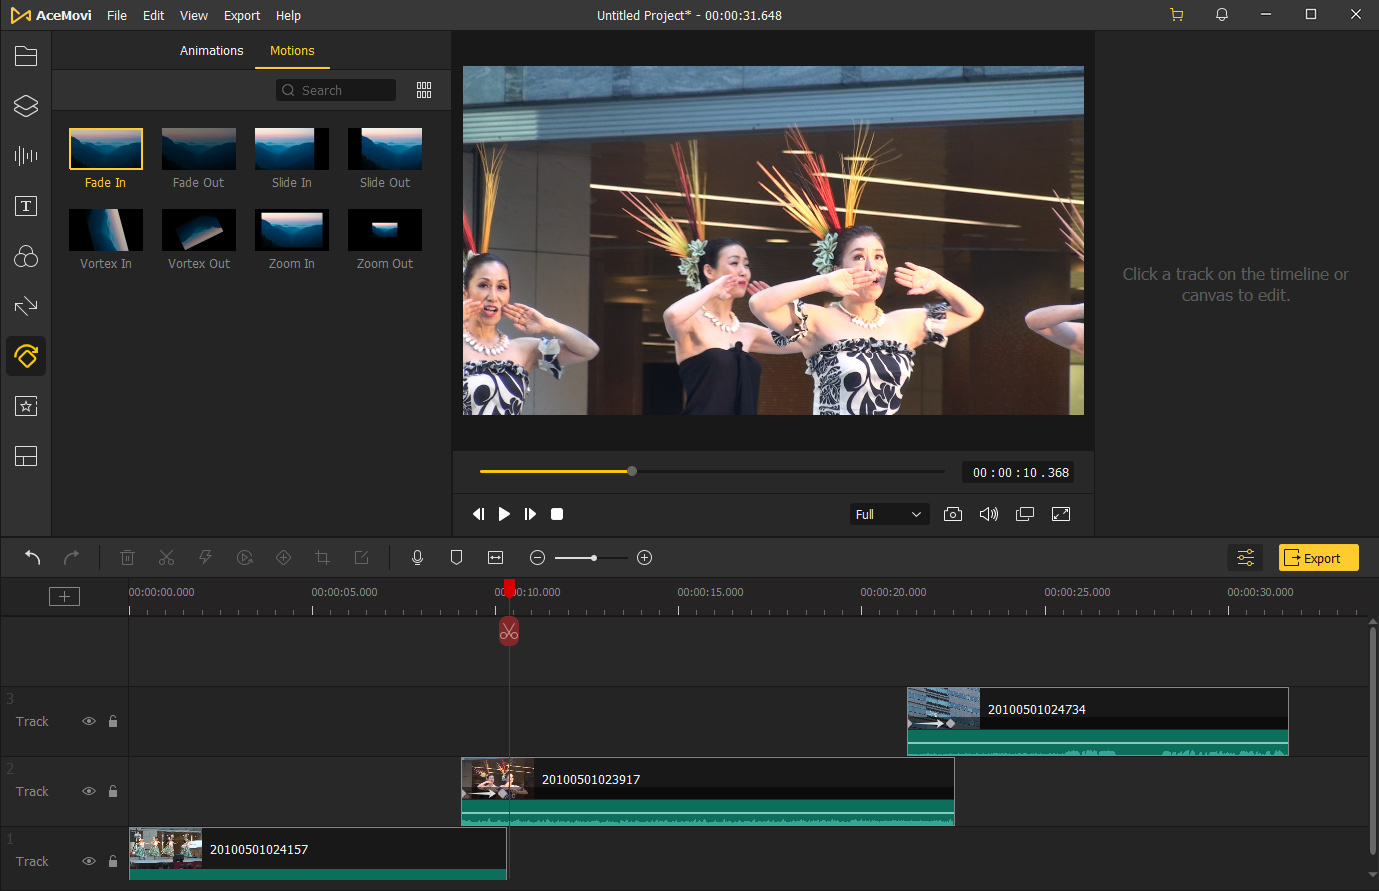
Notice the little "arrows" placed at the start of the video source in tracks 2 and 3: this is the Fade In motion effect, that ensures a smooth transition between the clips where we applied it and the clip immediately below it. As we can see, the arrow has two arrow dots that can be used to "resize" it, thus making the fade-in bigger or smaller; we have used them to end the fade-in effect right after the clip below ends, thus granting a nice transition between our three clips.
The Fade In motion effect is accessible through the top-left library window, which features a neat tab menu that can be used to switch between the various features & effects provided by the software: transitions, animations, effects, filters, overlays, and so on. Once you find the feature you want to use, just click on its icon and drag & drop it to the selected clip to apply it: the effect will be applied with its default settings (such as length), which can be modified later on through a practical UI-based interface (placed in the top-right part of the screen, to the right of the preview panel) that slightly vary depending on the effect type.
Adding Transitions
Technically speaking, the cross-fade effect that we have implemented using the Fade In motion effect could also be done using the Fade transition, as shown in the following screenshot:
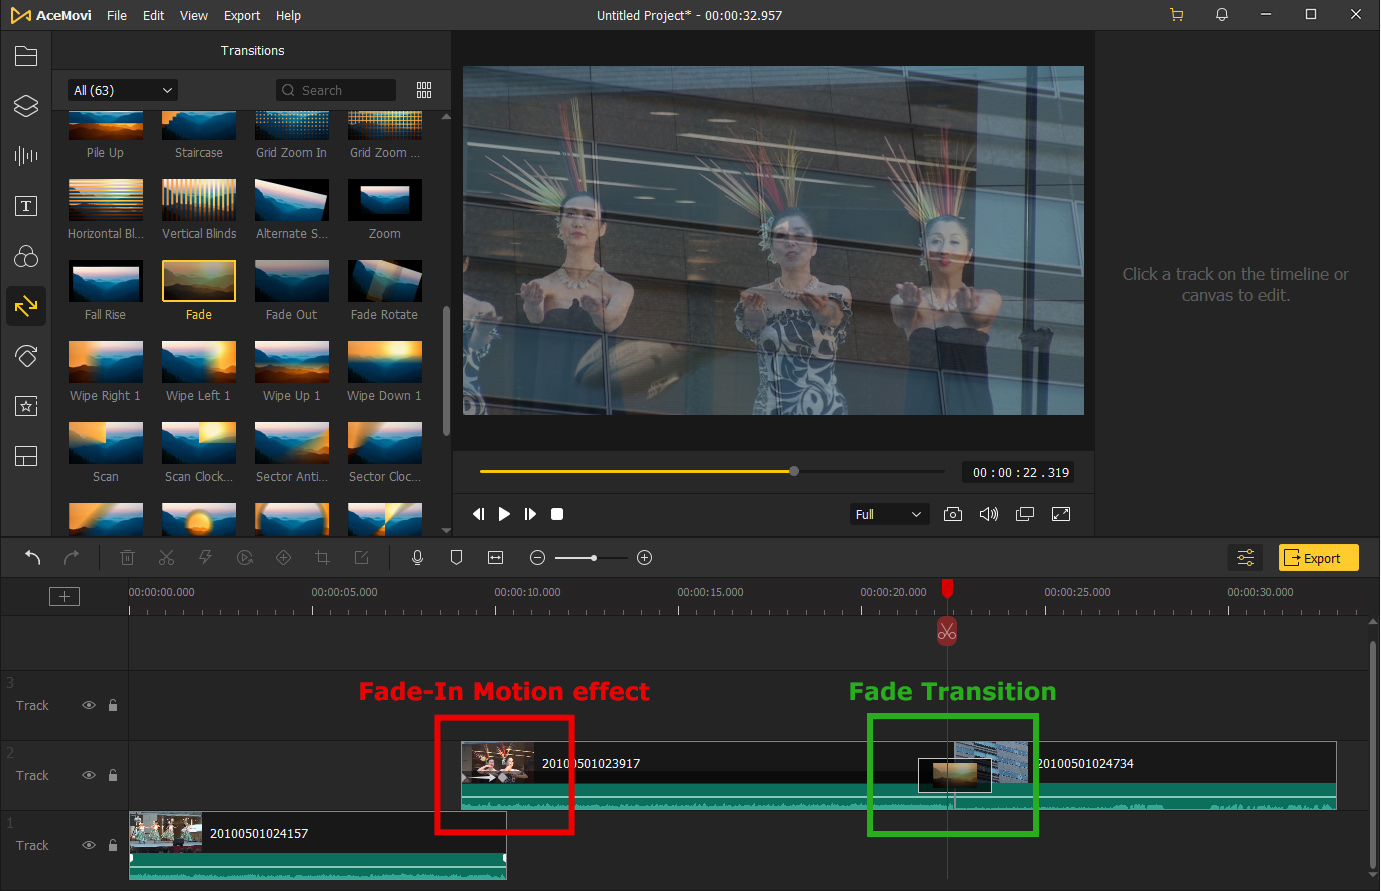
Notice the difference between the RED SQUARE, which shows the Fade-In Motion Effect, and the GREEN SQUARE, depicting the Fade Transition: as we can see, both method works, but the transition has the additional advantage that allows the two clips to be side-by-side in the same track, which is definitely better when dealing with a large number of clips. The resulting effect can be seen in real-time in the Preview window.
Other than playing with transitions and effects, we have thoroughly checked several other features: text overlays, filters, and even a neat split-screen feature that can be used to create compositions with multiple clips such as the one depicted in the screenshot below:
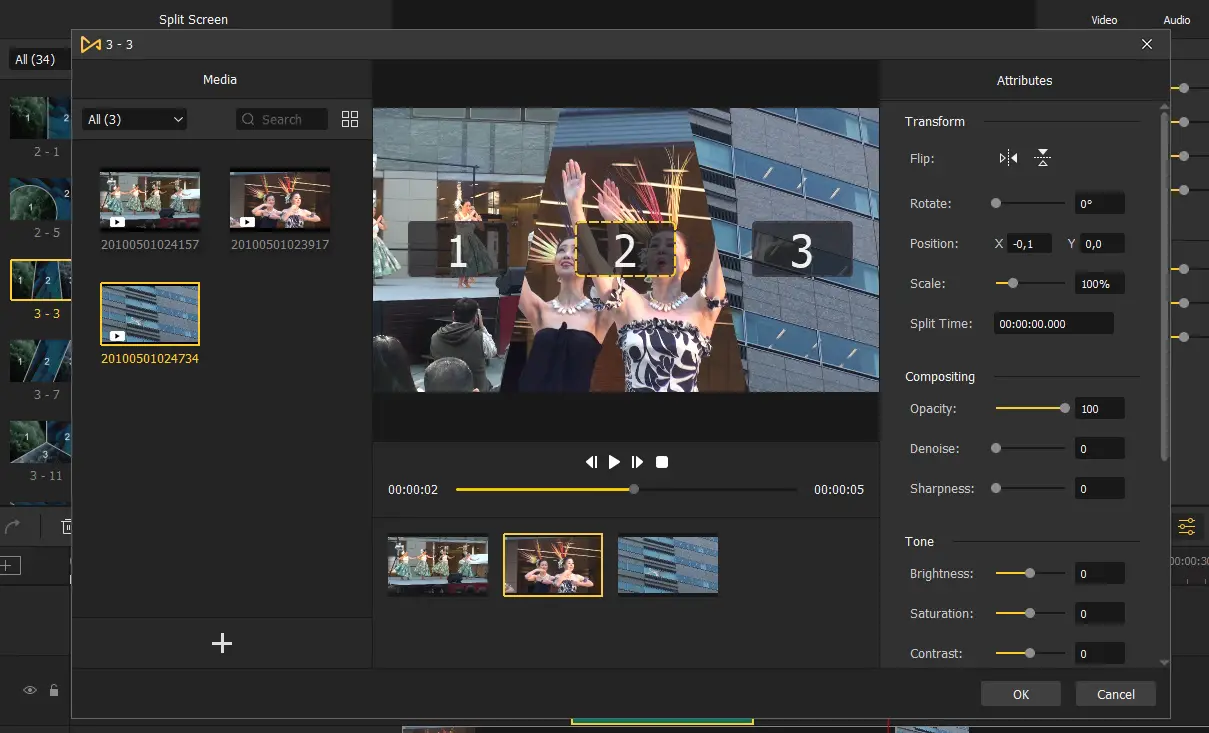
The thing we liked the most about AceMovi Video Editor is the extreme simplicity and user-friendliness of the UI: as you can see from the screenshot above, everything can be done in a very intuitive way: all we have to do is to choose the effect we want to apply, drag & drop it to the clip (or to the timeline) and then configure it using UI-based tools. Such an approach not only makes the software usable by (almost) anyone, even without specific video-editing practice or skills, but - more importantly - allows saving a lot of time.
Tutorials & Guides
In this test drive we've only covered a small subset of the many features provided by the software: if you want to see more, be sure to check out the official TunesKit AceMovi Video Editor YouTube channel, which contains a lot of useful tutorials that explain how to use the software within seconds, as well as converting some specific features.
Here's a small presentation video that introduces the software and enumerates its main features:
If you are not a video-learner type and/or prefer textual guides, you should definitely check out the AceMovi Learning Center, which contains some basic tutorials as well as a lot of common-case scenarios.
Trial version limitations
The trial version does not expire and has all the same features as the full version. The only difference if we compare it to the full version is that the exported videos will have a watermark. Every time we try to export a video using the trial version, a pop-up window will show up, asking us if we want to purchase a license (and remove the watermark) or keep the watermark on. As we can easily understand, this is an incredible opportunity to test the software before having to buy it!
Pricing
TunesKit AceMovi Video Editor can be purchased by choosing one of the following available plans:
- 1-Month Plan. $15.95 (instead of $39.95), 30-day money-back guarantee.
- 1-Year Plan. $49.95 (instead of $69.95), 5-day money-back guarantee.
- Lifetime Plan. $69.95 (instead of $109.95), 30-day money-back guarantee.
All the above plans have the same features (and no watermark on exported videos), except for the Lifetime Plan which also allows unlimited downloads of assets. The time period purchased is related to the free tech support and updates (1 month, 1 year, and lifetime).
Conclusion
That's it, at least for now: after our test drive, we can definitely say that TunesKit AceMovi is a solid software that delivers its promises: a professional, feature-rich video editing tool with a clear and immediate interface that makes it simple to use even when dealing with its most advanced features - that have nothing to envy too much more famous (and expensive) software. If you need Video Editing software with a soft learning curve and a great benefit-cost ratio, there's a high chance you will love it!
