This article is part of a series of tutorial posts I wrote on configuring a cloud data center on Aruba Cloud using the Cloud PRO service model, a typical IaaS public cloud environment not too different from Amazon AWS, Google Cloud Platform and MS Azure.
In this post we'll talk about how to properly configure pfSense, one of the two the open-source firewall alternatives offered by Aruba Cloud with their stock VM templates, to securely handle the public IP addresses and routing the HTTP/HTTPS traffic only to the other Virtual Machine servers using inbound NAT and outbound NAT rules.
Handling multiple IP addresses with pfSense Virtual IPs
Aruba Cloud Pro provides 1 free public IP address for each VM server that we add to our servers pool, which is also configured within a server's Network Interface Card. However, I did not want to have my VM servers directly connected to the internet: for that very reason I've chosen to setup all the IPs to the firewall (pfSense) so that it could handle all of them in a secure and centralized way.
This can be done using pfSense's Virtual IP feature, which allows the use of multiple IP addresses in conjunction with NAT or local services.
To do that, follow these instructions:
- From the pfSense main menu, navigate to Firewall > Virtual IPs
- Click the Add button to add a new Virtual IP address.
- Use the following settings:
- Type: IP Alias
- Interface: WAN, since we are configuring public IP addresses.
- Address type: single address
Repeat this process for all the public IP address you want to handle with pfSense until you're done, just like shown in the screenshow below:
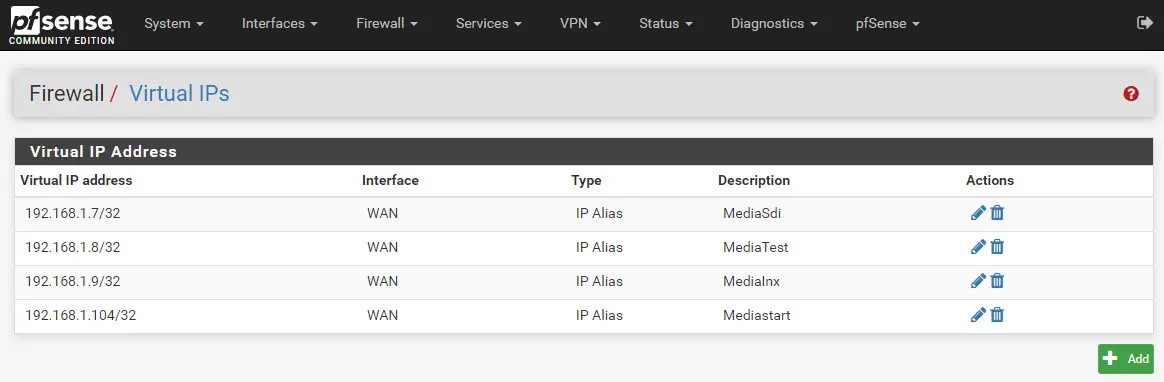
As we can see, I've also used the description field to give each IP address an identifying label which corresponds to the name of the VM server I will route that IP to.
Once defined, those Virtual IPs can be used in a number of useful ways, such as:
- Redirecting WAN traffic to a specific server connected to our LAN using one or more Inbound NAT rules (see Inbound NAT paragraph below).
- Translate the web requests coming from our internal servers to one (or more) WAN IP address(es), to make them able to access the internet with our WAN IP addresses (see Outbound NAT paragraph below).
Inbound NAT
NAT is an acronym for "Network Address Translation", which is a technique for remapping an IP address space into another by modifying network address information in the IP header of packets while they are in transit across a traffic routing device. In our given scenario, since we do have two different networks (WAN and LAN), we need to use NAT whenever we want to make the traffic originating from the internet to reach our server (inbound NAT) and vice-versa (outbound NAT).
Based on such premise, whenever we want to "open" one (or more) TCP and/or UDP ports from our servers and make it (or them) accessible from the web, we need to define a Inbound NAT rule that will translate the request addressed to a given WAN IP address/port to an internal LAN IP address/port.
Here's an example of a common inbound NAT rule configured on pfSense to "route" all the requests targeting the WAN IP address port 3389 (Remote Desktop Protocol) to reach our internal server using its LAN IP address (10.0.1.11):
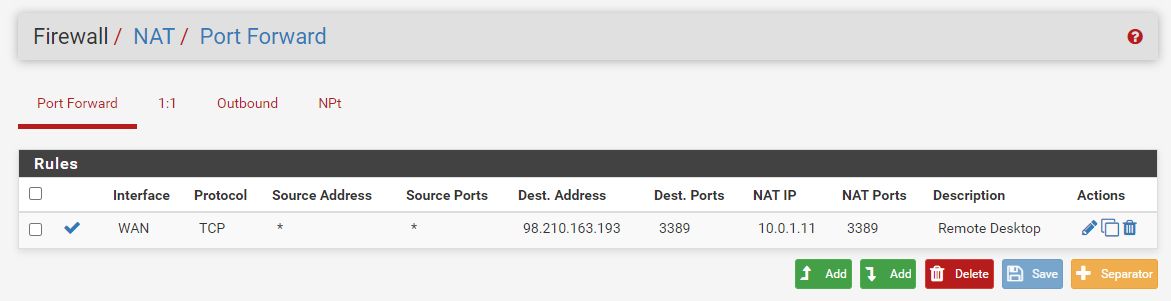
It's worth noting that Inbound NAT uses STATIC NAT on a PER PORT basis: this basically means that the inbound requests from the internet will match on an IP level as well as a per port basis.
Outbound NAT
Since the Cloud Servers are only configured within the internal LAN and didn't have a WAN connection anymore, in order to make them able to access the internet I also had to configure an Outbound NAT rule for each of them. As we explaining in the previous paragraph, we need to define outbound NAT rules whenever we want to translate the traffic originating from our servers (i.e. from the LAN) to the internet (i.e. to the WAN) so that it will be detected as coming from that given WAN IP.
Conversely from Inbound NAT, which use STATIC NAT on a PER PORT basis, Outbound NAT is defined through global NAT, also know as NAT overload or Port Address Translation (PAT): the "global" part of the rule is configured as the firewall’s outside interface, meaning that all traffic originating from the servers behind the firewall (LAN) going out to the internet (WAN) will appear to come from that "global" address instead.
In pfSense there are basically four methods to configure outbound NAT:
- Automatic Outbound NAT: the default scenario, where all traffic that enters from a LAN (or LAN type) interface will have NAT applied, meaning that it will be translated to the firewall's WAN IP address before it leaves. Although not always ideal, such method is good enough for most scenarios where we do want to grant internet access to *all* our internal servers and have their request detected as coming from our WAN IP address(es).
- Hybrid Outbound NAT rule generation: this method works just like the previous one, but it also allows the administrator to define additional rules to override the default behaviour: this is an excellent choice if we want to stick to the default logic with few exceptions.
- Manual Outbound NAT rule generation: this method will allow the administrators to manually define all the outbound NAT rules, including editing (or deleting) the default ones. For the sake of convenience, as soon as we select this method pfSense will populate the list of rules with the equivalent of the automatic rules, thus allowing us to keep, edit or delete them as we please.
Conclusion
That's it, at least for now: I hope that this brief guide will help other System Administrators to configure their pfSense firewall instance to properly route internal and external internet traffic (for specific ports only) from and to their VM servers through the firewall.
