Table of Contents
Some months ago we published a post explaining how to restrict access to a website to some IP addresses using the IP Address and Domain Name Restrictions IIS feature.
In this article, we're going to expand on such a topic further: more precisely, we'll learn where these settings are stored on the filesystem, and some alternative approaches we might consider to achieve the same results in a more practical way.
IP Address and Domain Name Restrictions
As we already know from this post, IIS allows restricting access to a website to a specific list of IP addresses. This possibility is managed through the IP Address and Domain Restrictions built-in feature, which supports two alternative usage modes:
- Whitelist, i.e. to prevent access to any external IP address with the exception of a list of authorized IPs.
- Blacklist, i.e. to authorize access to any external IP address with the exception of a list of blocked IPs.
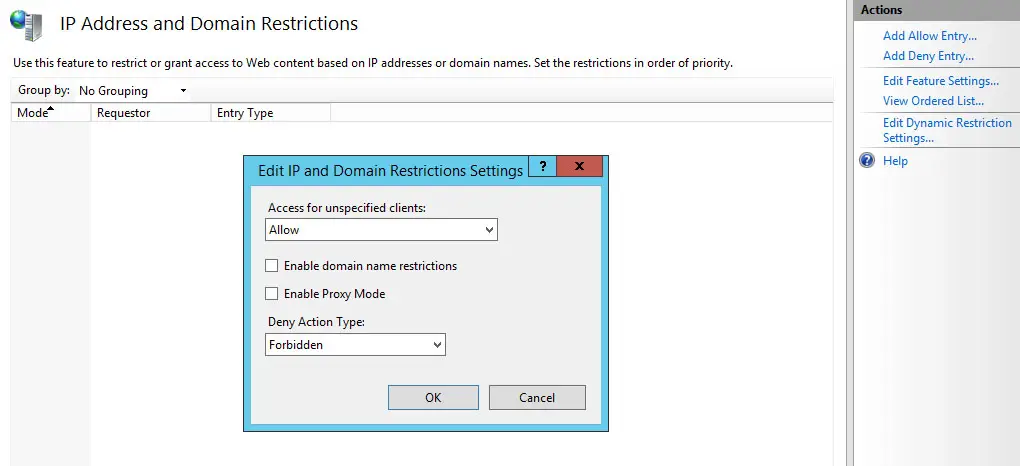
Such a feature is made accessible through the IIS Manager GUI, as shown in the screenshot below:
Using the feature from the IIS Manager GUI is quite simple, but it's not always convenient - especially if we need to handle several IP addresses or address masks - because the interface is quite scarce in terms of features: for example, we are unable to "edit" the entries once we have created them, there is no way to create several entries using some kind of bulk insertion (they must be added one at a time) or to clone entries across different web sites, there is no export feature, and so on.
These shortcomings might seem trivial when dealing with a few websites but can easily force System Administrators to waste a lot of their precious time when they need to manage several websites and/or web server instances. Is there a way to manage those IP addresses in a better way?
Introducing the applicationHost.config
Luckily, there is a better way to handle those restriction lists - especially if you are a fan of configuration files. However, in order to understand how to do that, we need to learn where the IIS Manager GUI stores these IP Address restrictions settings. The answer to this question is quite simple: those settings are stored in the applicationHost.config file, which is located in the following path:
- C:\Windows\system32\inetsrv\config\applicationHost.config
If we open this file, we can easily see how it contains a lot of entries related to our websites. More specifically, the IP Address restrictions settings look like that:
|
1 2 3 4 5 6 7 8 9 10 11 12 |
<system.webServer> <location path="www.mywebsite.com"> <system.webServer> <security> <ipSecurity allowUnlisted="false" enableProxyMode="true"> <add ipAddress="90.98.92.0" subnetMask="255.255.255.0" allowed="true" /> <add ipAddress="90.69.30.186" allowed="true" /> </ipSecurity> </security> </system.webServer> </location> </system.webServer> |
As we can see, the magic happens inside the <system.webServer> tag, which contains a <location> entry for each website which is actively using this feature (among those present within our IIS configuration).
If we compare the XML attributes that we can see on the <ipSecurity> tag and its inner entries, we can easily notice that they use the same syntax (and settings) of the IIS Manager GUI: Allow Unlisted, Enable Proxy Mode , and so on. That's great to know, since it means that we could manually edit this file to perform several tasks that could be slow and tedious to do using the GUI - such as "cloning" the IP address list, editing them, exporting it to a separate text file, and so on.
However, manually handling the applicationHost.config file is not always a convenient thing to do, since it has several downsides:
- No errors allowed. The applicationHost.config file is a critical system file: if we make a syntax error while editing it and save it in a wrong state, all our websites will crash.
- High privileges. The applicationHost.config file can only be opened (and modified) by administrators: no developer and/or deployment operator would be able to access or edit it, which can be a nasty limitation considering that they are the ones that will most likely need to add/remove the IP addresses from those blacklists/whitelists.
- Bad portability. All our websites' settings will be stacked on that single, huge file: if we want to copy/export/move some of these websites to a different server, we would have to remember to migrate those settings as well - otherwise we'll just lose the IP Address restriction settings.
For all the above reasons, we suggest considering a third approach: store the IP Address restrictions directly in the application's web.config file.
Using the web.config file
The IP Address restrictions can be configured within the web.config file of any single website in the following way:
|
1 2 3 4 5 6 7 8 9 10 |
<system.webServer> <system.webServer> <security> <ipSecurity allowUnlisted="false" enableProxyMode="true"> <add ipAddress="90.98.92.0" subnetMask="255.255.255.0" allowed="true" /> <add ipAddress="90.69.30.186" allowed="true" /> </ipSecurity> </security> </system.webServer> </system.webServer> |
Notice how the syntax and attributes are the same as the applicationHost.config file - the only missing thing here is the <location> tag since the location is implicit (the current website).
Error 500.19
The first time you implement the <ipSecurity> tag inside a web.config file you may get the following error:
Config Error: This configuration section cannot be used at this path. This happens when the section is locked at a parent level. Locking is either by default (overrideModeDefault = "Deny"), or set explicitly by a location tag with overrideMode = "Deny" or the legacy allowOverride = "false".
This error usually occurs when inserting the <ipSecurity> tag inside the web.config file without first allowing/enabling this configuration option to be overridden globally (the default behavior is Deny).
The solution is to edit the applicationHost.config file and change the defaut behavior from "Deny" to "Allow" in the following way:
|
1 |
<section name="ipSecurity" overrideModeDefault="Allow "/> |
Common applicationHost.config file paths
If you are using IIS, the applicationHost.config file path is the following one which we have mentioned early on:
- C:\Windows\system32\inetsrv\config\applicationHost.config
However, if you are using IIS Express (which is rather common if you are a Visual Studio developer), and you are getting the above 500.19 error due to the "denied" usage of the <ipSecurity> tag, you might want to also check out the following paths:
- C:\Users\<username>\Documents\IISExpress\config\applicationHost.config (IIS Express global configuration path)
- C:\Projects\<ProjectFolder>\ .vs\<ProjectName>\config\applicationHost.config (IIS Express project-specific path)
Conclusions
That's it: we hope that this post will help other System Administrators to restrict access to their websites using the web.config file in a quick and effective way.
