Table of Contents
Making photos, you can capture precious moments and be able to return to that atmosphere and literally feel it one more time. The effect may be increased if dozens of pictures are organized in the form of a photo book. With the help of Swift Publisher, the process is a piece of cake even for the newcomers in the field.
What should you do in order to make the best photo book on your Mac? Follow these simple instructions and create a digital masterpiece!
Step 1. Preparation
In Swift Publisher, there are 500+ templates that will simplify the creation of numerous projects greatly.
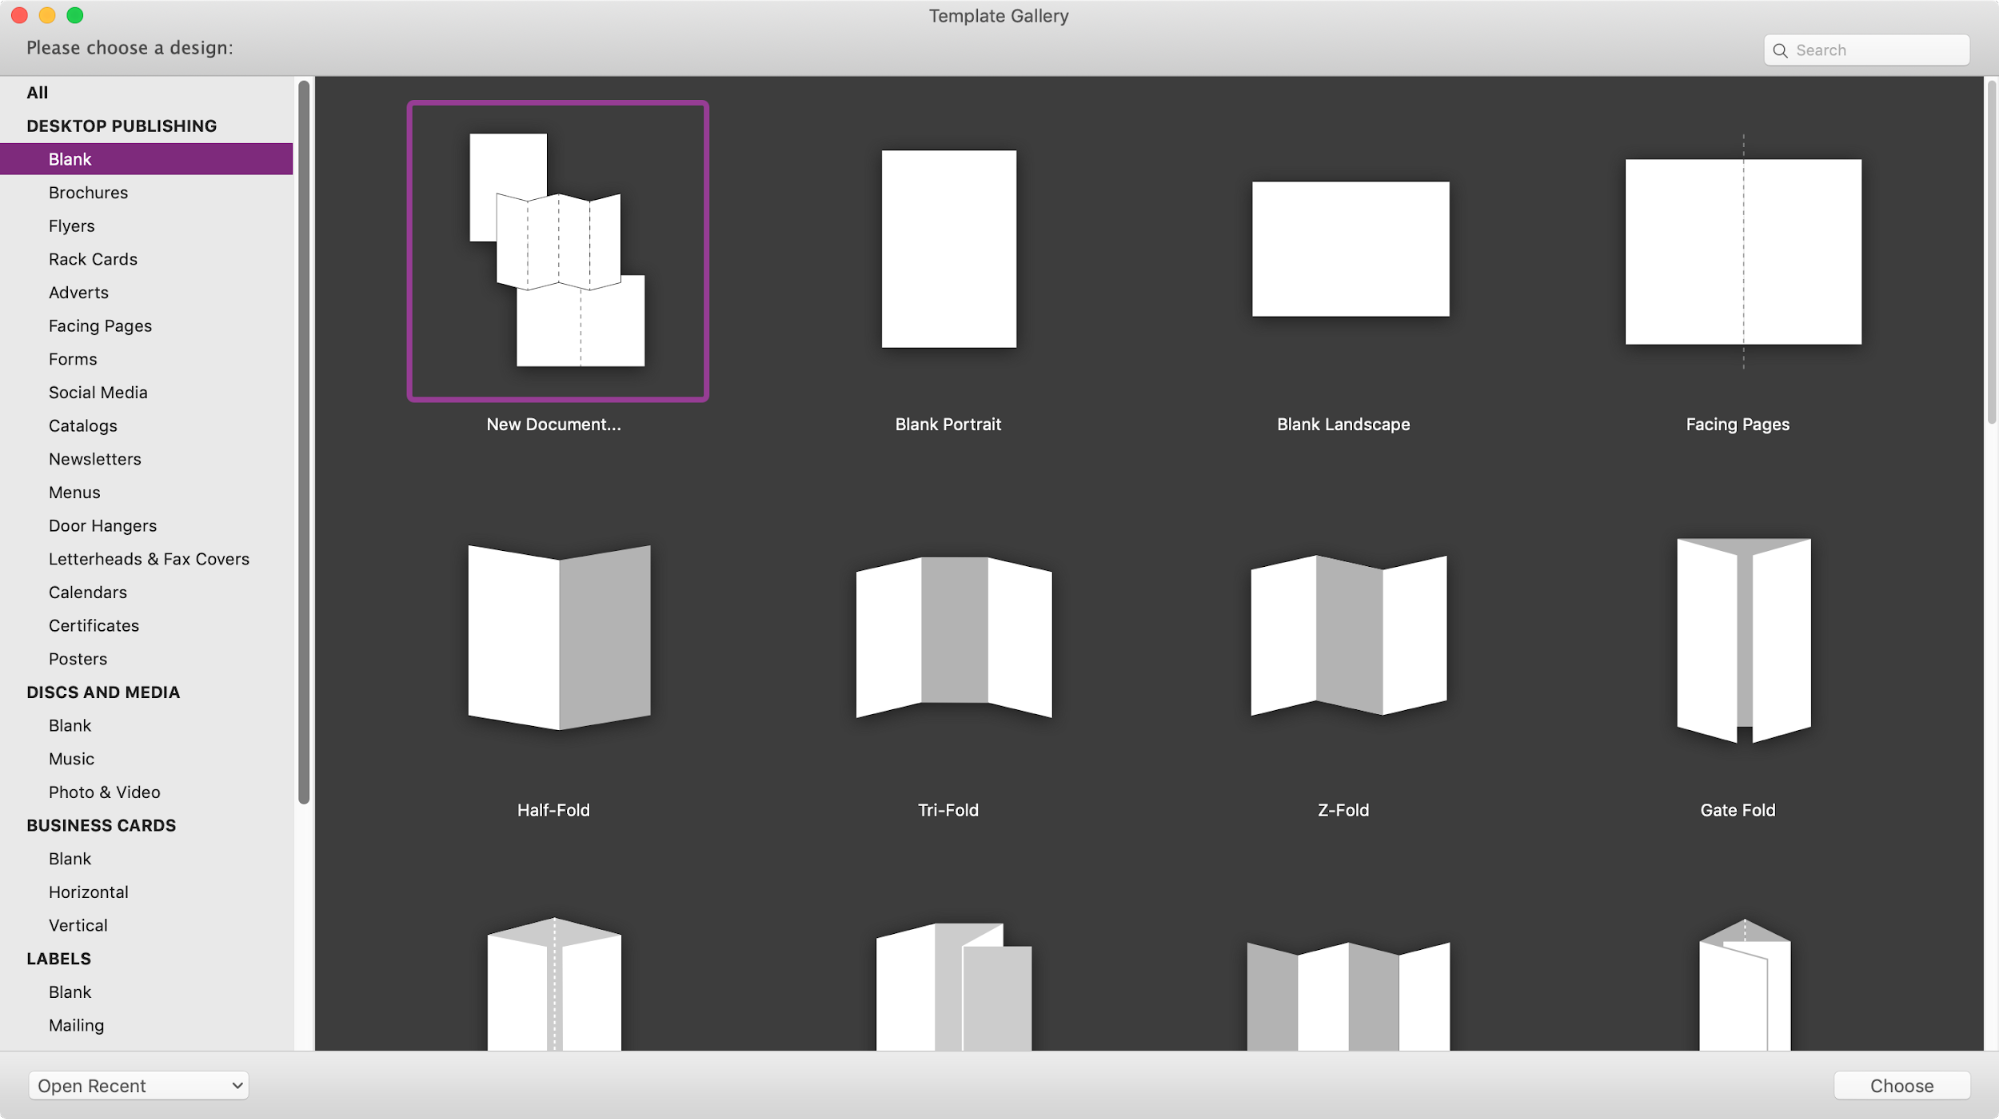
However, if you want to personalize your product, you have to start from scratch. For that, create a new file and choose the necessary format and orientation. The function is accessible in the Templates Gallery.
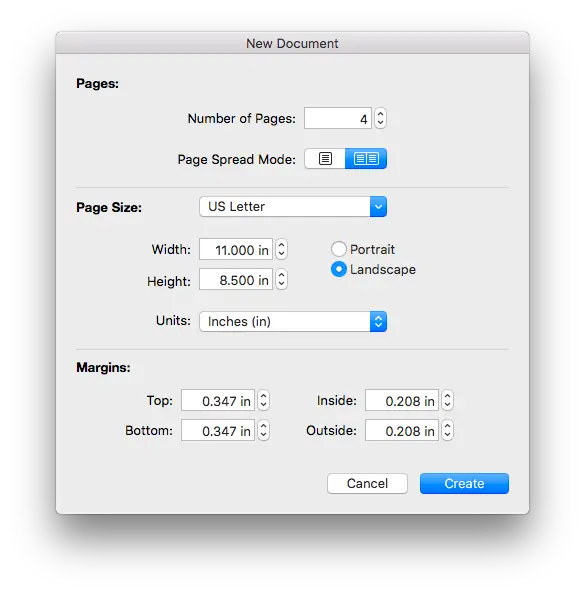
The number of pages can be adjusted later. If you want to make sure all the elements placed will not alter their location when publishing the final file, don’t forget to apply the margins. Due to them, users are able to control how close the objects are to the sheet’s edges.
Step 2. Background
You won’t like to place the photos just on the white sheets, will you? On the Inspector panel on the left, users can find a rich suite of tools to customize the background options.
Swift Publisher enables you to style your photo book with several colors and images. You can select them from the program’s library or your Mac folders. With drag-and-drop, it is a simple task to organize the space of your project in the way you prefer.
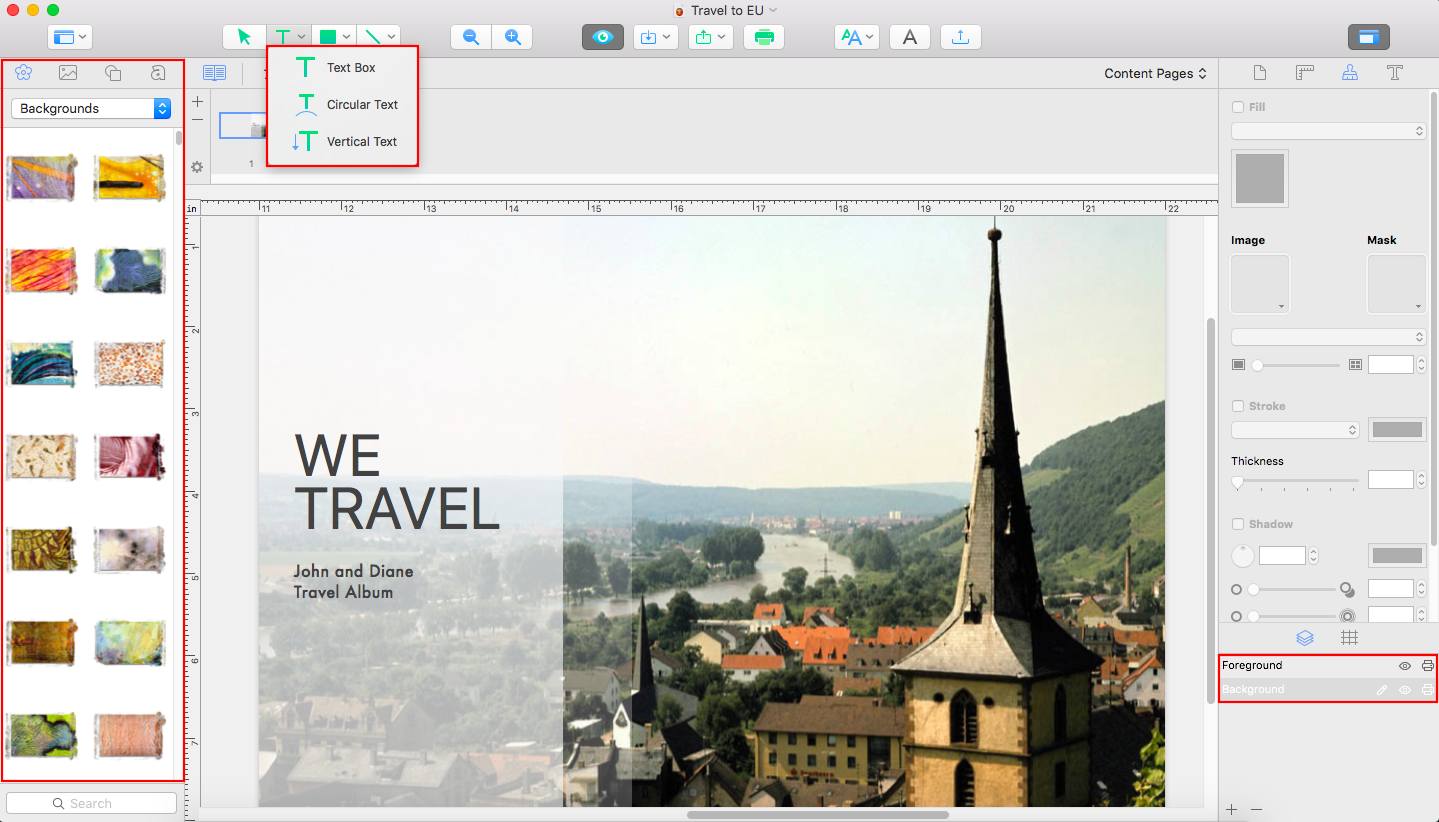
Don’t forget to make a cover page. Usually, it is the first sheet of your multi-page project. You can use the same background for it or play with other styles. Besides, Swift Publisher allows naming the document: when choosing the heading, you are capable of mixing fonts and text sizes to select the best effect. 2D and 3D configurations are also available.
Step 3. Customization
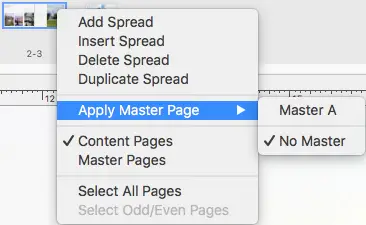
There is one awesome feature about Swift Publisher that will simplify the work with your photo book dramatically.
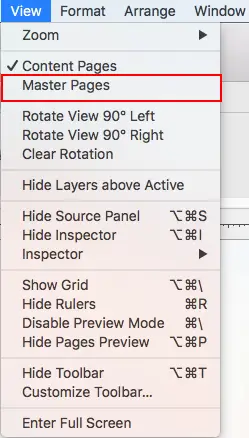
With Master Pages, you can create the same background for all or selected pages. There won’t be any need to repeat actions for multiple sheets. The feature is accessible in the View section.
Come back to the foreground. To add a greater realistic effect, designers can create placeholders for images to insert. You can turn this idea into reality with the Rectangle tool — just draw as many squares and rectangles as needed.
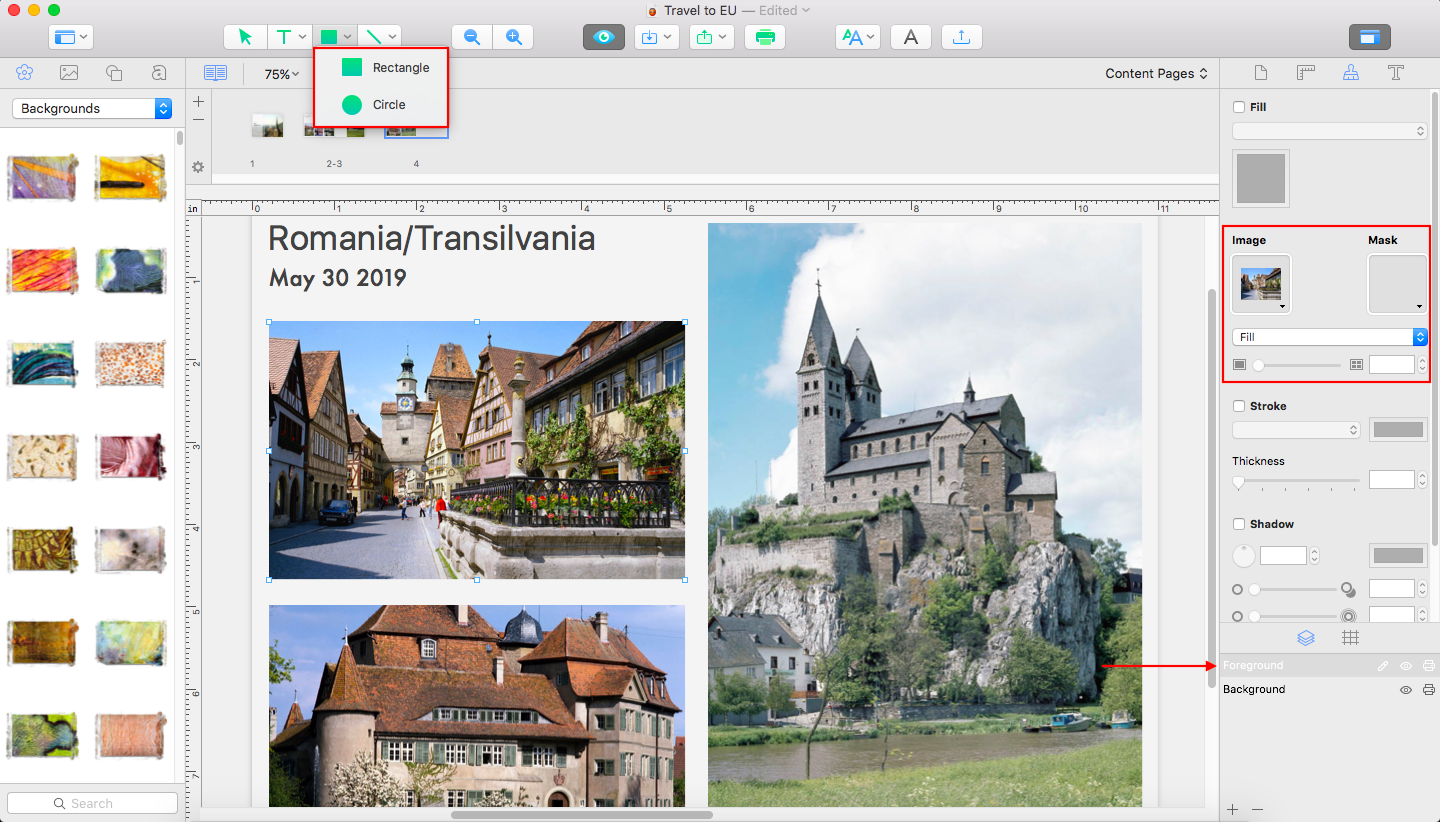
To control their parameters, apply to the Stroke feature of the Appearance menu in the Inspector panel.
Step 4. Adding Photos
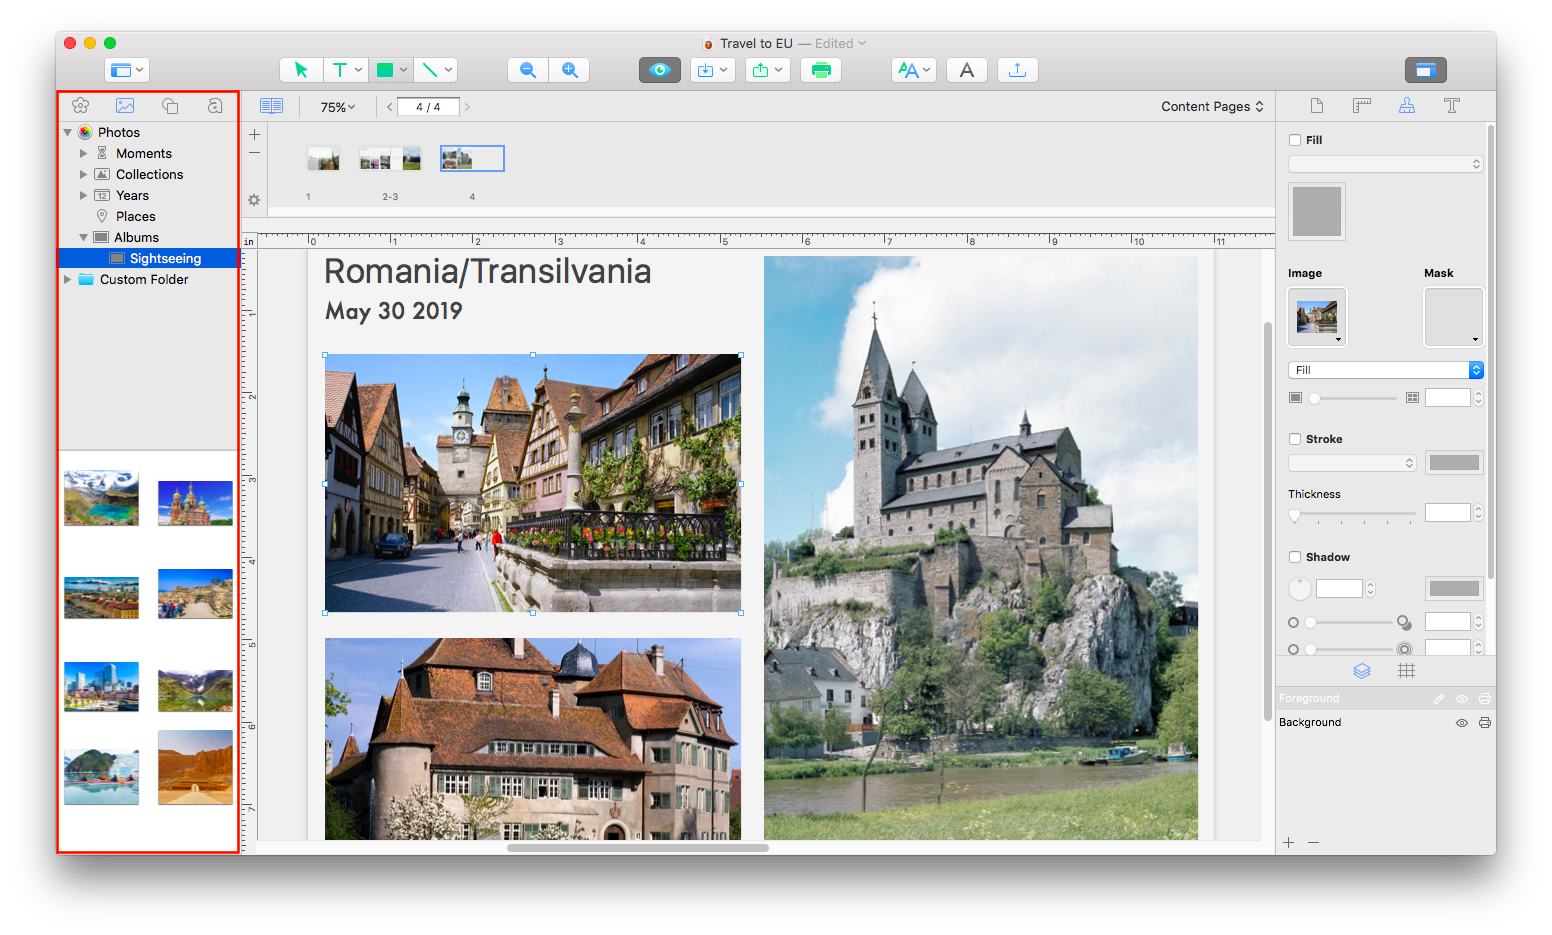
At the Source Panel on the left, you can access the photos you have. Another option is to go to Custom Folders.
All you need to do then is to fill the space with photos without changing the placeholders’ dimensions is to drag and drop the image and adjust it with the Fill parameter on the Appearance tab.
Step 5. Final stage
If your project is ready, it is a high time to save it or export it for further manipulations (sharing e-version with friends or printing the file, for instance). The procedure is very smooth: just go to the File Menu and select the Export function.
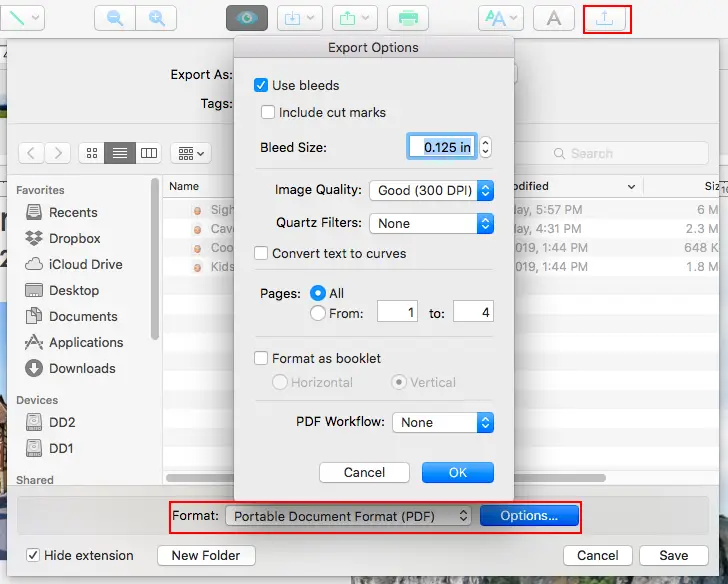
Swift Publisher allows saving in different formats, but PDF is usually recommended. At this stage, you are able to set the image quality and bleeds. In the first case, choose 300 DPI. In the second one, please, go for 0.125”.
Conclusion
That's it, at least for the time being: going through the above five steps is quite easy, and there's a high chance that you'll achieve a good quality product that is worth the energy and resources spent. If you need additional info, you can visit the Swift Publisher’s official site at https://www.swiftpublisher.com/ and check out their official tutorial,guides and resources available.