Table of Contents
A few days ago we've published a guide explaining how to send email messages via SMTP with MailKit implementing a custom MailKitEmailSender class based upon the ASP.NET Core built-in IEmailSender interface; few days later, we've added another guide explaining how to use that class to send transactional e-mail messages using SendInBlue.com, an affordable all-in-one SAAS-based platform that offers transactional e-mail services.
However, MailKit is not the only mail-client library that we can use to implement the IEMailSender interface: in this post, which will be the third of that series, we'll see how we can implement it using the Twilio SendGrid .NET Core package, which can be used to send transactional e-mail using the Twilio SendGrid services and their API.
For those who don't know what we're talking about, Twilio SendGrid is a all-in-one SAAS-based platform that offers transactional services such as Email, SMS, Chat (and more) through a versatile set of APIs that can be invoked and consumed from external websites or web services; its feature set makes it rather similar to SendInBlue, Mailgun, Amazon SES and the likes, at least when it comes to e-mail sending capabilities.
1. Create an Account
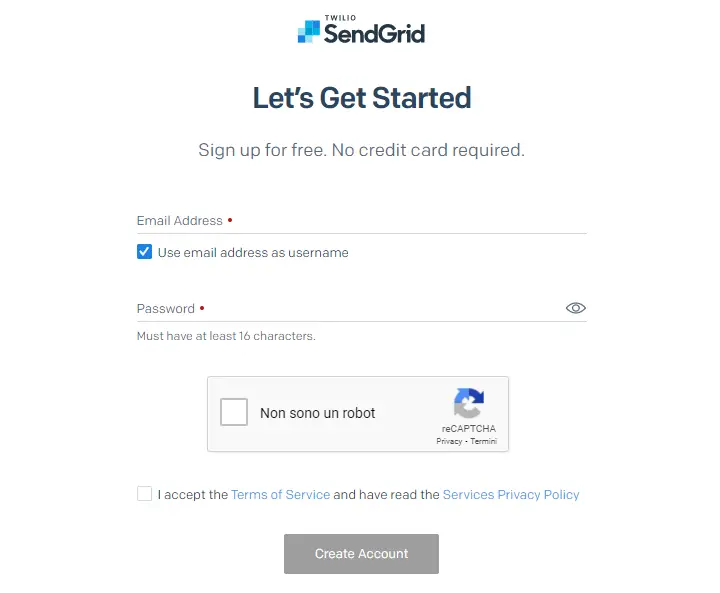
The first thing we need to do is to create an account to Twilio SendGrid: doing it is extremely easy, we just have to fill up the required fields, as shown in the following screenshot:
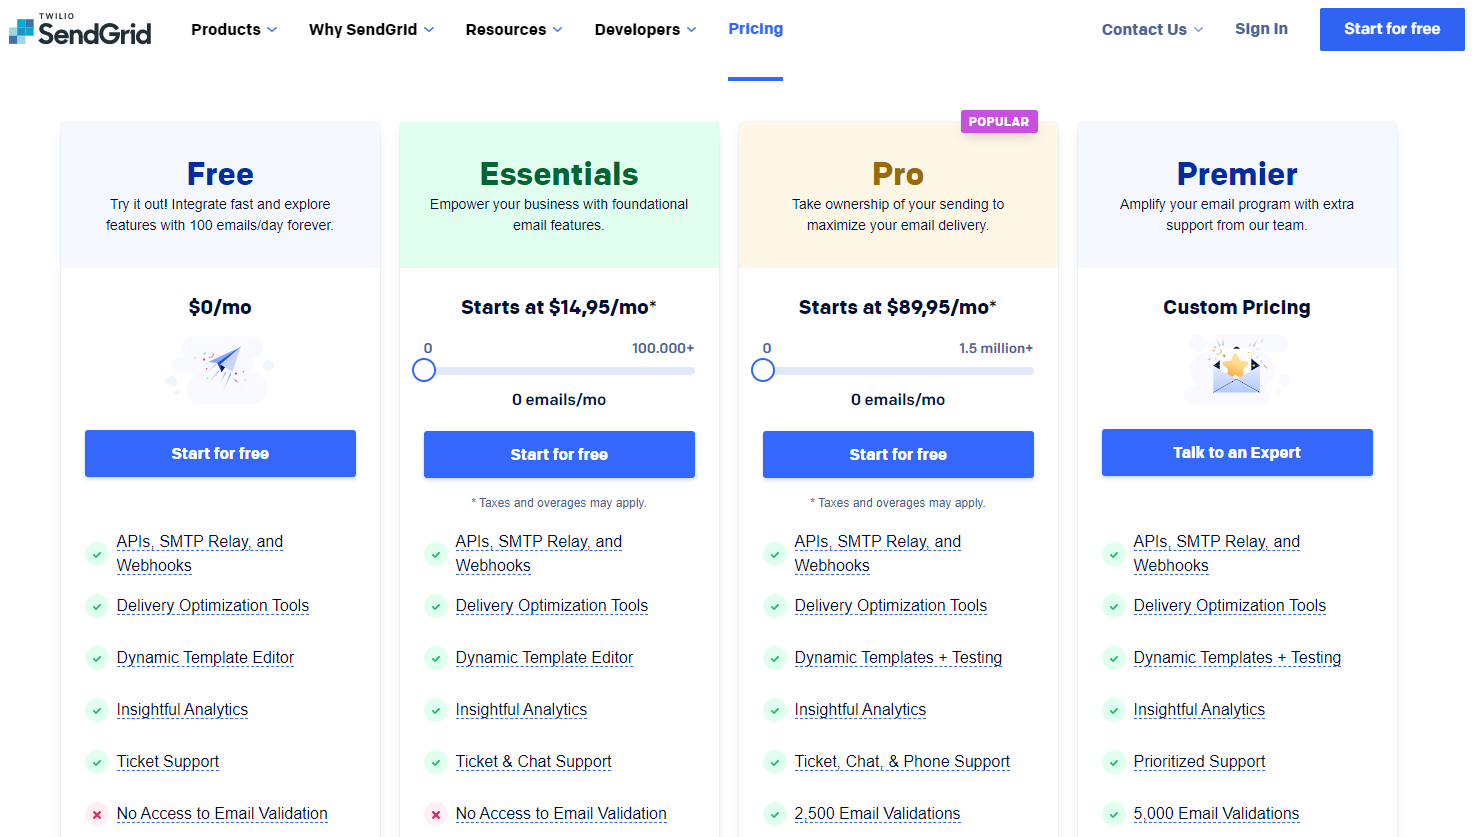
Once done, we need to select one of the various pricing plan available: the best thing we can do, at least for the time being, is to select the FREE plan, which allows to send up to 100 e-mail messages per day; that's more than enough for testing out our implementation.
In order to complete the registration phase we'll need to confirm our given e-mail address: as soon as we do that, we can move to the next steps.
2. Choose between Web API and SMTP Relay
Right after completing the registration phase and performing the login we'll be brought to the SendGrid's main dashboard panel, which allows us to monitor our recent activities as well as managing our campaigns, templates, settings, and more.

Once there, select the Email API option from the left-side menu to access the Integration guide option, which is what we're going to use SendGrid for.
From the Integration guide section, we'll be prompted to select between two available choices:
- Web API, for direct app integration using the SendGrid official packages for the various supported languages (PHP, Ruby, Java, C# and more).
- SMTP Relay, which can be used to retrieve the SendGrid SMTP data and implement it using a third-party e-mail sender interface such as MailKit.
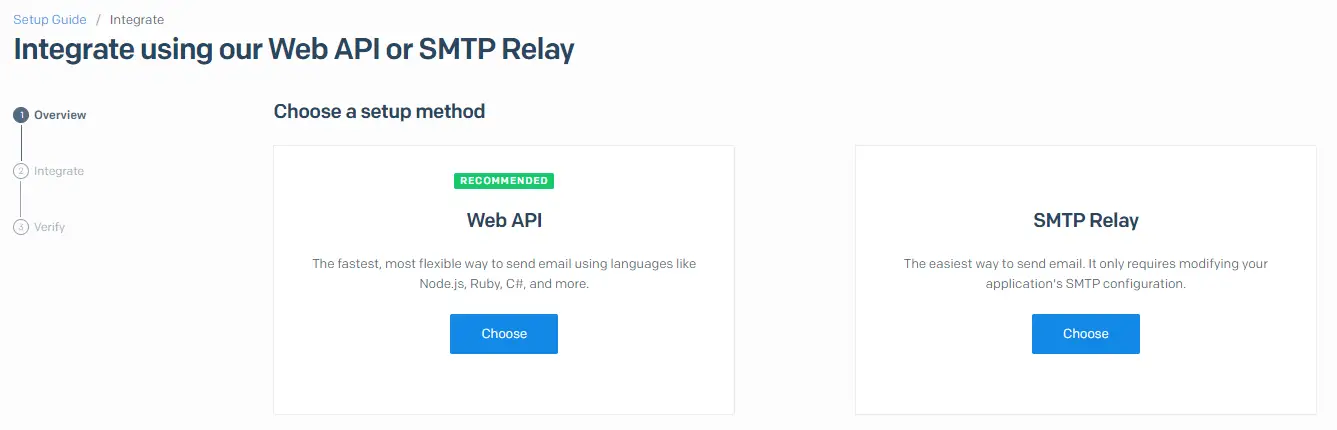
If you want to take the "easy" route, just select the SMTP Relay option, fetch the SMTP data and then read our How to send e-mail message with .NET Core and any SMTP server using MailKit guide instead of going further with this post: however, this is not the approach that we would recommended, at least for SendGrid. If you want to have more control on your e-mail sending process, then the Web API is definitely the way to go; also, if we look at the green RECOMMENDED flag above such option, we can see how even the SendGrid website agree with us.
That said, if you agree with us and SendGrid, select the Web API option and keep reading.
3. Get the Web API keys
After selecting the Web API option we'll access to the SendGrid's Web API setup guide, which is among the best guides we've ever seen (no kidding): you can retrieve the Web API Key, read all the required info and even get a working code sample to get the stuff done.
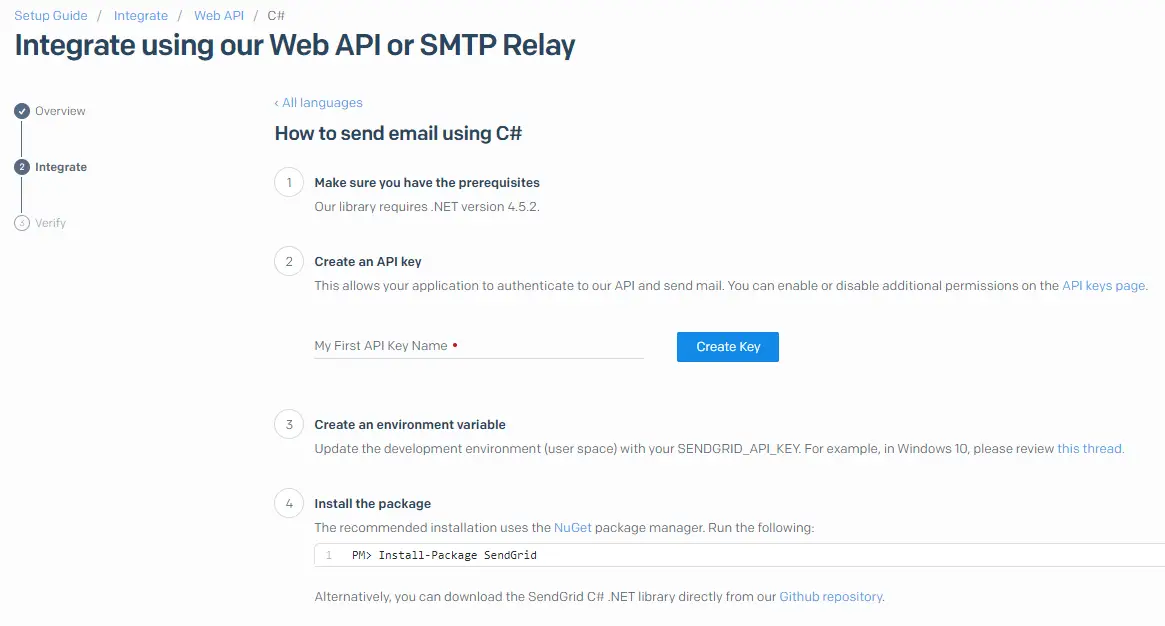
Here's a list of what we need to do here:
- Create a new API key and copy its value to a safe place (we're going to use it in a few while)
- Install the SendGrid NuGet package on the ASP.NET Core project where we want to send the emails from (here's the official link)
- Verify the integration using the sample code provided by the SendGrid page, modifying it to get the API key from the chosen Environment Variable, User Secret or plain text.
- Set the API key in a dedicated Environment Variable (following SendGrid's instruction): in case we don't want to follow the Environment Variable approach, we can either:
- Use the Web API key in plain-text within our app's code (not recommended)
- Use the Visual Studio's User Secret approach (as explained in our How to securely store password in Visual Studio using User Secrets guide)
- Create our own implementation code by adding the C# classes required by the IEmailSender interface, using the sample code as reference.
The first task can be easily done using the website’s interface; the second task can be done by typing the following command within the Visual Studio's Package Manager Console:
|
1 |
PM> Install-Package Sendgrid |
The remaining activities deserve more work: let's see how we can get them done.
4. Verifying the integration using the sample code
Here's how the SendGrid's guide sample code looks like: the line of code where we need to put the API Key value has been marked.
|
1 2 3 4 5 6 7 8 9 10 11 12 13 14 15 16 17 18 19 20 21 22 23 24 25 26 27 28 29 30 |
// using SendGrid's C# Library // https://github.com/sendgrid/sendgrid-csharp using SendGrid; using SendGrid.Helpers.Mail; using System; using System.Threading.Tasks; namespace Example { internal class Example { private static void Main() { Execute().Wait(); } static async Task Execute() { var apiKey = Environment.GetEnvironmentVariable("NAME_OF_THE_ENVIRONMENT_VARIABLE_FOR_YOUR_SENDGRID_KEY"); var client = new SendGridClient(apiKey); var from = new EmailAddress("test@example.com", "Example User"); var subject = "Sending with SendGrid is Fun"; var to = new EmailAddress("test@example.com", "Example User"); var plainTextContent = "and easy to do anywhere, even with C#"; var htmlContent = "<strong>and easy to do anywhere, even with C#</strong>"; var msg = MailHelper.CreateSingleEmail(from, to, subject, plainTextContent, htmlContent); var response = await client.SendEmailAsync(msg); } } } |
In order to test the integration we need to implement the above code (more precisely, the Execute method) within our web application's Program.cs file: when doing that, ensure to change the first line of the Execute method in the following way:
|
1 |
var apiKey = "PUT-YOUR-API-KEY-HERE"; |
Alternatively, we can create a brand new ASP.NET web application (or console application) project and test the SendGrid integration there, so that we won't need to roll-back the changes within our app's source code... Or just ignore this part and test our final implementation.
5. Set the API key
Although the SendGrid sample code suggests the use of an environment variable, we strongly advise you to not do that and implement the API key as instructed by our Visual Studio User Secrets guide. For the sake of simplicity, let's just take for granted that we'll be using that technique and therefore having our API key stored in our project's secrets.json file (or in our app's appsettings.json file, if we feel bold enough) in the following way:
|
1 2 3 4 5 6 7 8 9 |
{ "ExternalProviders": { "SendGrid": { "ApiKey": "PUT-YOUR-API-KEY-HERE", "SenderEmail": "test@email.com" "SenderName": "NoReply", } } } |
Now that our API key is in place, let's see how we can adapt the SendGrid sample code to create our very own IEmailSender interface implementation. In ordert to do that we basically need to create two classes:
- a custom class derived from the built-in EmailSender base class: this is the class that will contain the main e-mail sending logic;
- an options class that will contain the mail sender settings, which will be used as initialization parameter of the main class;
The SendGridEmailSenderOptions class
Let's start with the options class:
|
1 2 3 4 5 6 7 8 9 10 11 |
namespace MyApp { public class SendGridEmailSenderOptions { public string ApiKey { get; set; } public string SenderEmail { get; set; } public string SenderName { get; set; } } } |
As we can see, this class will be used to store the API key that we’ve created a short while ago and a couple other settings.
The SendGridEmailSender class
Here's the main custom class:
|
1 2 3 4 5 6 7 8 9 10 11 12 13 14 15 16 17 18 19 20 21 22 23 24 25 26 27 28 29 30 31 32 33 34 35 36 37 38 39 40 41 42 43 44 45 46 47 48 49 50 51 52 53 54 |
using Microsoft.AspNetCore.Identity.UI.Services; using Microsoft.Extensions.Options; using SendGrid; using SendGrid.Helpers.Mail; using System.Threading.Tasks; namespace MyApp { public class SendGridEmailSender : IEmailSender { public SendGridEmailSender( IOptions<SendGridEmailSenderOptions> options ) { this.Options = options.Value; } public SendGridEmailSenderOptions Options { get; set; } public async Task SendEmailAsync( string email, string subject, string message) { await Execute(Options.ApiKey, subject, message, email); } private async Task<Response> Execute( string apiKey, string subject, string message, string email) { var client = new SendGridClient(apiKey); var msg = new SendGridMessage() { From = new EmailAddress(Options.SenderEmail, Options.SenderName), Subject = subject, PlainTextContent = message, HtmlContent = message }; msg.AddTo(new EmailAddress(email)); // disable tracking settings // ref.: https://sendgrid.com/docs/User_Guide/Settings/tracking.html msg.SetClickTracking(false, false); msg.SetOpenTracking(false); msg.SetGoogleAnalytics(false); msg.SetSubscriptionTracking(false); return await client.SendEmailAsync(msg); } } } |
As we can see, we’ve altered the sample code provided by SendGrid website to create a custom class which extends the IEmailSender interface. Most of the action takes place within the interface’s Execute method, where the email message is built, then configured using the SendGridEmailSenderOptions object that we’ve added early on, and eventually sent using the SendEmailAsync method provided by the SendGrid client.
Implementing the interface in the Startup class
Now that we do have our classes, we just need to configure them in a dedicated transient service that we can define in our application's Startup class.
Open the Startup.cs file and add the following code at the end of the Configure method:
|
1 2 3 4 5 6 7 |
services.AddTransient<IEmailSender, SendGridEmailSender>(); services.Configure<SendGridEmailSenderOptions>(options => { options.ApiKey = Configuration["ExternalProviders:SendGrid:ApiKey"]; options.SenderEMail = Configuration["ExternalProviders:SendGrid:SenderEmail"]; options.SenderName = Configuration["ExternalProviders:SendGrid:SenderName"]; }); |
As we can see by looking at the above code, we are still using the test@example.com testing email address taken from the SendGrid sample code. It goes without saying that, before being able to actually send e-mail messages, we’ll have to replace it with a real e-mail address.
This can be done with the SendGrid’s Create new sender feature (in the Marketing > Sender section), that allows to add one or more new sender addresses and use them within the API. Once added, each sender must be verified, as explained in the side notes within the SendGrid's Add a Sender modal window:
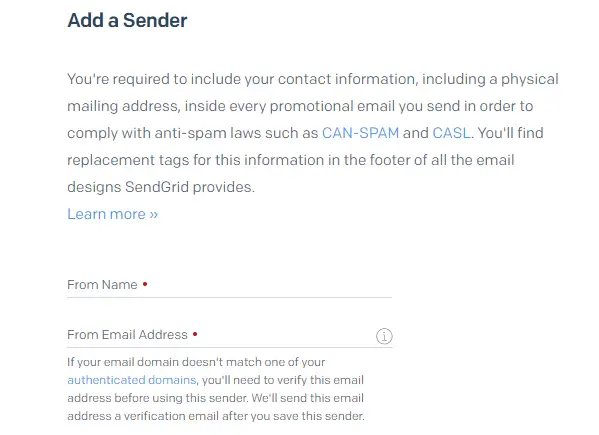
As we can see, SendGrid currently supports two verification methods:
- registering the e-mail address domain under the authenticated domains section;
- answering to a verification email that will be sent to the e-mail address registered as sender.
Both methods would be viable enough for most scenarios: in our case, for the sake of simplicity, we suggest validating a single e-mail address, setting it to the Startup’s ConfigureServices method (thus replacing test@example.com in the above code), and go ahead.
This concludes our SendGrid implementation. Now we'll be able to use what we just did to send any e-mail message from our Controllers, including the identity-related ones (account login, account registration, e-mail verification, password recovery, and so on), by istantiating the IEmailSender interface using Dependency Injection:
|
1 2 3 4 5 6 7 8 9 10 |
public class MyController : Controller { private readonly IEmailSender _emailSender; public MyController( IEmailSender emailSender) { _emailSender = emailSender; } } |
And then call the SendEmailAsync method from any action method, in the following way:
|
1 |
await _emailSender.SendEmailAsync("target0@email.com", "subject", "text"); |
Conclusions
That's it, at least for now: we hope that this simple guide will help other ASP.NET Core developers in configuring their custom EmailSender using the SendGrid service.

 what it is and how to prevent it")