
Implementing Data Encryption at-rest on all clients and server machine became a fundamental pillar of the IT Security policy of most companies. In this article we'll see how we can implement such feature on any Windows 10 or Windows Server machine using the built-in BitLocker technology provided by Microsoft.
BitLocker provides full volume encryption (FVE) for operating system volumes, as well as fixed and removable data drives. To support fully encrypted operating system drives, BitLocker uses an unencrypted system partition for the files required to boot, decrypt, and load the operating system. This volume is automatically created during a new installation of both client and server operating systems.
Are we ready? Let's start!
Introduction
Before delving into the practical implementation it might be wise to spend a few minutes to better understand what BitLocker actually is and how it can help us to achieve our Data Encryption At-Rest needs.
In a nutshell, BitLocker is a full volume encryption feature included with Microsoft Windows versions starting with Windows Vista: it has been specifically designed to protect data by providing encryption for entire volumes; by default, it uses the AES encryption algorithm in cipher block chaining (CBC) or XTS mode with a 128-bit or 256-bit key, but it can be configured to use other cyphers/encryption modes as well.
BitLocker is available on:
- Ultimate and Enterprise editions of Windows Vista and Windows 7
- Pro and Enterprise editions of Windows 8 and 8.1
- Pro, Enterprise, and Education editions of Windows 10
- Windows Server 2008 and later
For more information about BitLocker, see the BitLocker overview and how it applies to Windows Server 2012 and later from Microsoft Docs.
For these reasons, it's strongly recommended that you perform the operations described on the following sections only if you're an experienced user and - most importantly - if you don't deal with privacy-sensitive or corporate data. If that's not the case, we strongly suggest to seek professional aid from a trusted IT security company that can help you to define and setup the proper disaster recovery process for your specific scenario.
Installation
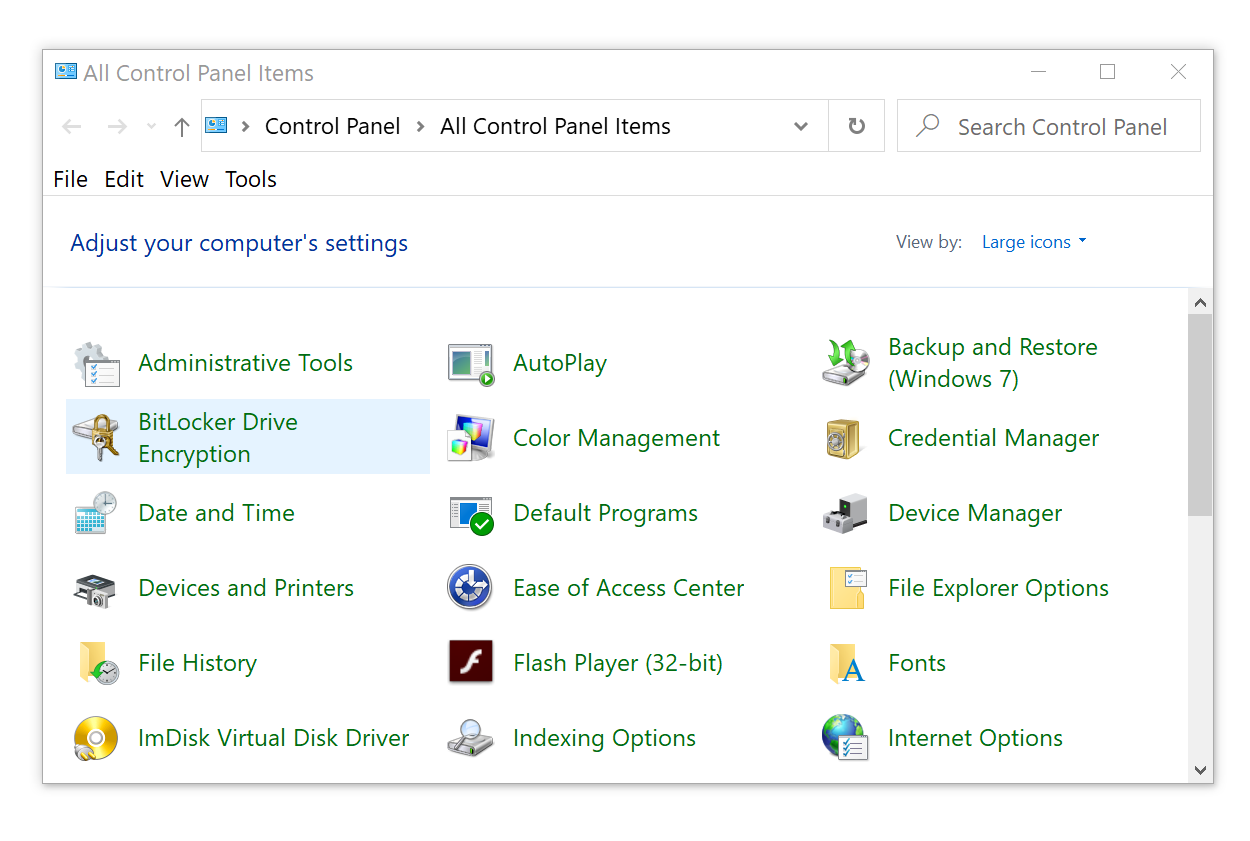
On most Windows systems BitLocker should already be installed: you can easily check it out by opening the Windows Control Panel and check if the BitLocker Drive Encryption feature is present, as shown in the screenshot below:
 If such icon is not there, it means that you have to manually install the BitLocker Drive Encryption feature: this can be done using Server Manager or PowerShell in the following way.
Server Manager
Open Server Manager by selecting the Server Manager icon or by hitting the Windows Key + R key combo (for the Run tool) and then typing servermanager.exe. Once done, perform the following steps:
- Select Manage from the Server Manager Navigation bar and select Add Roles and Features to start the Add Roles and Features Wizard.
- With the Add Roles and Features Wizard open, select Next at the Before you begin pane (if shown).
- Select Role-based or feature-based installation on the Installation type pane of the Add Roles and Features wizard pane, then select Next to continue.
- Select the Select a server from the server pool option in the Server Selection pane and confirm the server for the BitLocker feature install.
- Select Next on the Server Roles pane of the Add Roles and Features wizard to proceed to the Features pane.
- Select the check box next to BitLocker Drive Encryption within the Features pane of the Add Roles and Features wizard. The wizard will show the additional management features available for BitLocker: we strongly suggest to add everything, since you'll likely need those optional tools someday. However, if you do not want to install these features, deselect the Include management tools option; once done, select Add Features, then select Next to proceed in the wizard.
- Select Install on the Confirmation pane of the Add Roles and Features wizard to begin BitLocker feature installation. The BitLocker feature requires a restart to complete. Selecting the Restart the destination server automatically if required option in the Confirmation pane will force a restart of the computer after installation is complete.
PowerShell
To install BitLocker from PowerShell, together with all the optionals tools, open a PowerShell command prompt and type the following command:
|
1 |
Install-WindowsFeature BitLocker -IncludeAllSubFeature -IncludeManagementTools |
or (alternate commands using the DISM module):
|
1 |
Enable-WindowsOptionalFeature -Online -FeatureName BitLocker, BitLocker-Utilities -All |
If you don't want to install the optional tools, use the following command instead:
|
1 |
Install-WindowsFeature BitLocker |
or (alternate commands using the DISM module):
|
1 |
Enable-WindowsOptionalFeature -Online -FeatureName BitLocker -All |
In both cases a reboot will be required for BitLocker to be shown on Control Panel.
Activate BitLocker
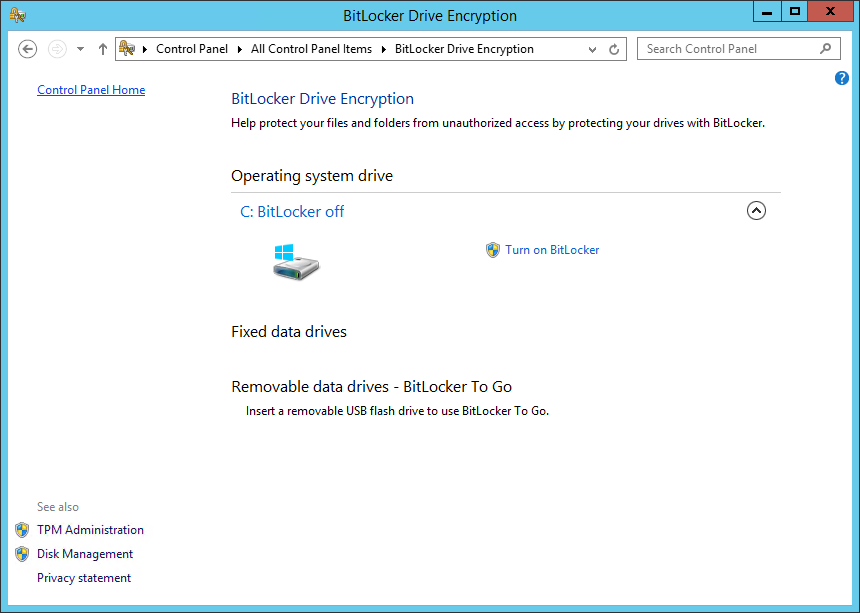
Once BitLocker has been installed within your system, you can open the Control Panel and select the BitLocker Drive Encryption icon (see screenshot above). Once done, you'll be asked to activate BitLocker for the system drive, as well as for all the other drives:
What to do next depends if your machine hardware has a Trusted Platform Module (TPM) or not.
Trusted Platform Module (TPM)
Trusted Platform Module (TPM, also known as ISO/IEC 11889) is an international standard for a secure cryptoprocessor, a dedicated microcontroller designed to secure hardware through integrated cryptographic keys. A computer with a TPM must also have a Trusted Computing Group (TCG)-compliant BIOS or UEFI firmware. The BIOS or UEFI firmware establishes a chain of trust for the pre-operating system startup, and it must include support for TCG-specified Static Root of Trust Measurement.
The default BitLocker configuration requires a Trusted Platform Module, or TPM, on your computer’s motherboard: this chip generates and stores the actual encryption keys. It can automatically unlock your PC’s drive when it boots so you can sign in just by typing your Windows login password. Such implementation is really simple to use for the average user, because the TPM will perform all the "hard" work under the hood, and will also be the most secure: if someone tampers with the PC or removes the drive from the computer and attempts to decrypt it, it can’t be accessed without the key stored in the TPM; at the same time, the TPM won’t work if it’s moved to another PC’s motherboard, thus making it the ideal choice to securely protect the encyrpted data.
If you don't have a TPM module, you can buy a TPM chip and add it to your motherboard, as long as it supports such kind of add-on; however, if your motherboard (or laptop) doesn’t support doing so, or if you don't want to spend additional money for getting the required hardware, you'll be forced to adopt one of the BitLocker implementations that doesn't require the presence of a TPM: it goes without saying that they will be definitely less secure, but they're still way better than having no encryption at-rest at all.
Activating BitLocker without a TPM
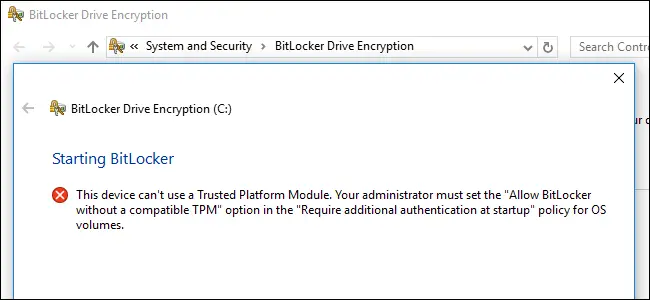
If you try to activate BitLocker without a TPM using the Turn on BitLocker button, you'll be prompted with the following error message:
This device can't use a Trusted Platform Module. Your administrator must set the "Allow BitLocker without a compatible TPM" option in the "Require additional authentication at startup" policy for OS volumes.
As the pop-up text suggests, you can bypass this limitation through a Group Policy change: if your PC is joined to a business or school domain you'll most likely need to ask to a Domain Administrator (unless you're one of them), since group policies are likely configured centrally; if you’re just doing this on your own PC or on a PC not joined to a domain, you can use the Local Group Policy Editor instead.
Here's what you need to do:
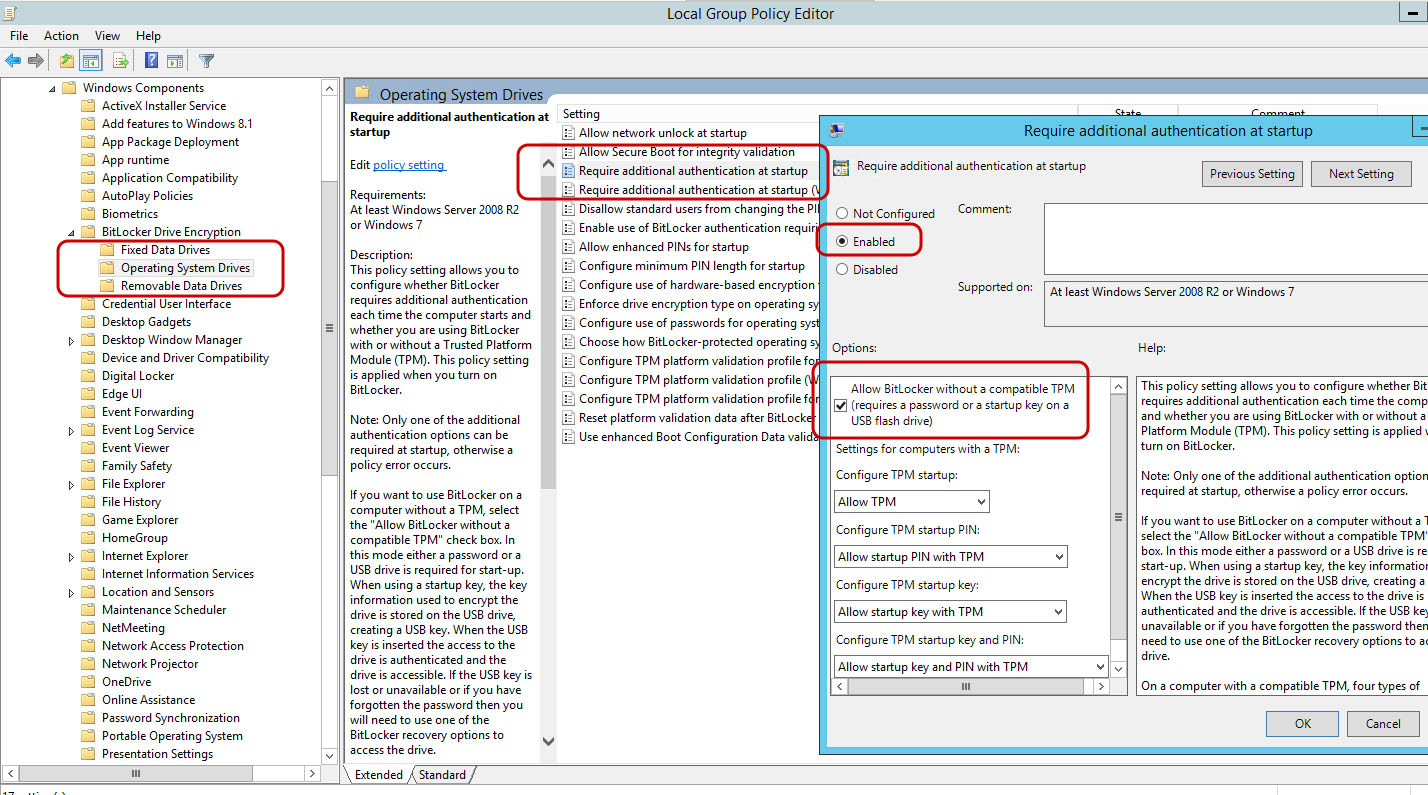
- Press Windows+R on your keyboard, type gpedit.msc into the Run dialog box, and press Enter.
- Navigate to Local Computer Policy > Computer Configuration > Administrative Templates > Windows Components > BitLocker Drive Encryption > Operating System Drives.
- Select the Require additional authentication at startup option.
- Enable it by selecting Enabled at the top of the window, then ensure that the Allow BitLocker without a compatible TPM (requires a password or a startup key on a USB flash drive) checkbox is checked.
Once done, you can go back to the Control Panel and select Turn on Bitlocker to encrypt your Hard Drive.
Among the other things, you'll be asked to either create a USB device or to prompt a password: the former option will create a USB device that will be required to startup or reboot your PC, while the latter will ask you to choose a password that you'll need to input instead of using the USB device.
For that very reason, if you want to implement a secure at-rest encryption method which is also compatible with remote work, we suggest to leave the System Hard Drive unencrypted and move all the relevant/sensitive data to a secondary Hard-Disk that you can encrypt and/or decrypt once Windows is booted.
Once you've chosen your preferred method, the system will reboot and the at-rest encryption process will start: the duration of the encryption might vary, depending on how many data BitLocker has to encrypt: at the end of the process, your system will be encrypted and ready to (securely) use!
Performance impact
According to Microsoft, BitLocker Drive Encryption has a single-digit percentage performance impact, as explained here. In a nutshell, there's a small performance overhead relative to the throughput of the storage operations on which it needs to operate.
Conclusions
That's it, at least for now: we sincerely hope that this tutorial will help Windows enthusiasts and System Administrators that are looking for a fast and effective way to implement a proper encryption at-rest security measure on their Windows systems using the BitLocker Drive Encryption feature.