Table of Contents
In this five-part tutorial we'll see how we can create a sample React Native app (you might call it a "Hello World" or "boilerplate") that will be capable of receiving Push Notifications using Firebase. Such guide could be a great headstart for React Native beginners, yet also for those intermediate or experienced developers who want to know more about push notifications: how they work, what are their best usage scenarios and how much they can be an improvement for almost any mobile app.
The entire source code shown throughout this tutorial, as well as a working sample app built with it, is available on GitHub under MIT license: if you happen to like it, don't forget to give it a star (and a like to this website)!
For the sake of simplicity this tutorial has been splitted into multiple parts, each one dedicated to a specific sub-topic:
- Part 1 of 5: Understanding Push Notifications, in which we'll try to understand what push notifications actually are and the impact they could have (when used properly) on a typical client-server app.
- Part 2 of 5: Setup React Native and Firebase, where we'll deal with the installation and configuration of our whole development stack: React Native, the Firebase SDK and the Visual Studio Code environment, together with the required settings to get our app ready to work with Android and iOS.
- Part 3 of 5: Configure the Firebase Service, in which we'll create the Firebase Project and configure the Firebase Push Notification Services to ensure that our React Native app will be able to receive push notifications through the Firebase API on any Android and iOS device.
- Part 4 of 5: Design and Test the React Native UI, where we'll test our front-end skills by laying out a React-Native UI in order to make our app actually able to receive push notifications and send HTTP requests to the server to remotely keep track of our actions - and possibly fire subsequent push notifications to other clients.
- Part 5 of 5: Server-Side Handler, in which we'll use ASP.NET Core to create a sample, lightweight web service that will be able to receive HTTP requests issued by the clients and/or feed them with push notifications through the Firebase API.
In this third post we'll see how we can configure the Firebase Service for Android and iOS environments.
Create the Firebase project
Now that our app is up and running, we just need to configure the Firebase Service to ensure that our React Native application will be able to receive push notifications through the Firebase API.
- Create a Google account (if you don't have one already).
- Navigate to the Google Firebase website.
- Click to the Get Started button.
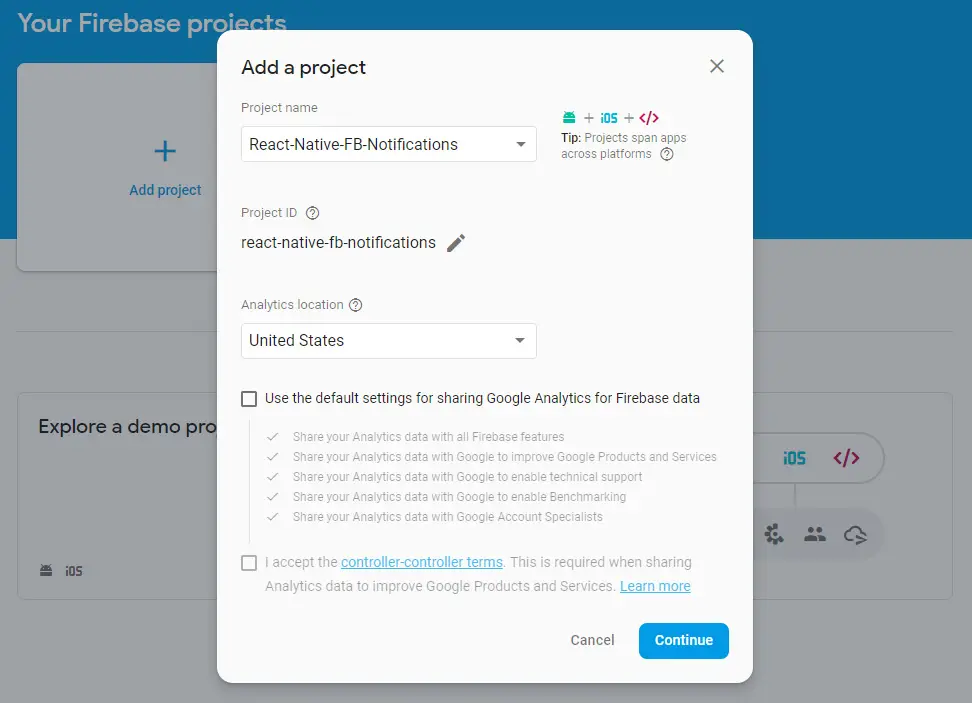
- Add a new Firebase project.
Configuring the Firebase Service
Once the project is ready, you'll be asked to add one or more app on it. More specifically, we need to add two apps: one for Android and one for iOS.
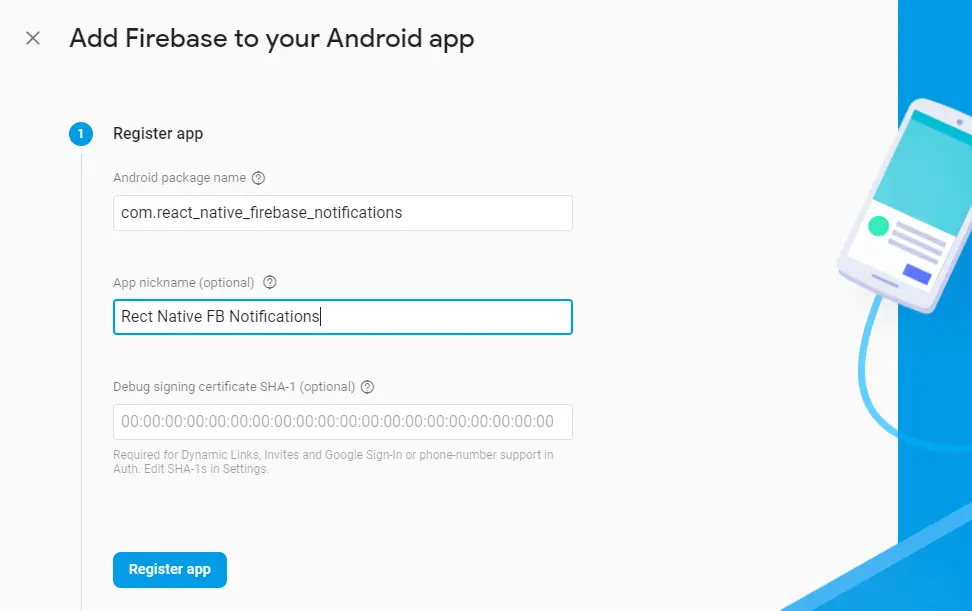
Firebase Android App
Add a new Android app by clicking on the android logo and fill in the relevant values.
Once done, you'll be given the chance to download a google-services.json file containing the required configuration to run Firebase on the Android version of your React Native app: download and save it within the /android/app/ folder of your React Native app, just as explained and illustrated on the web page itself:
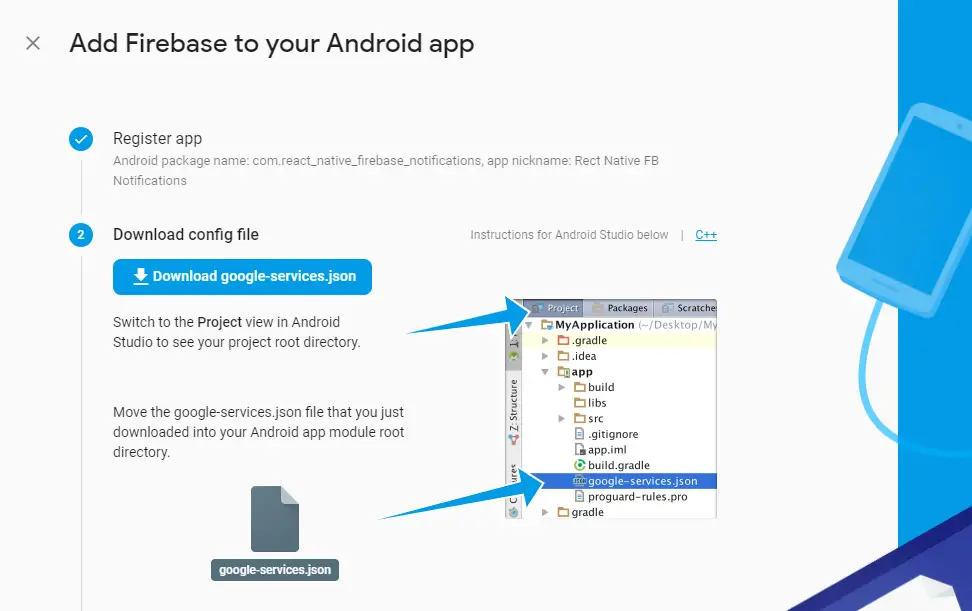
Download the google-services.json file and placing it in the appropriate folder, then get ready to go ahead.
Steps 3 and 4 can be skipped, as we already performed their relevant tasks in the part 2 of this guide: for this reason, just click the Next button a couple times
press the Next button a couple times to enter into the Run your app to verify installation phase. This is basically a ping test that Firebase will do to verify that your app can connect to its API, thus ensuring that the SDK has been installed correctly.
As soon as the test runs, you will see a grey message saying that Firebase is trying to check for your app presence. Leave the web page open, switch to Visual Studio Code and run your React Native app in debug mode.
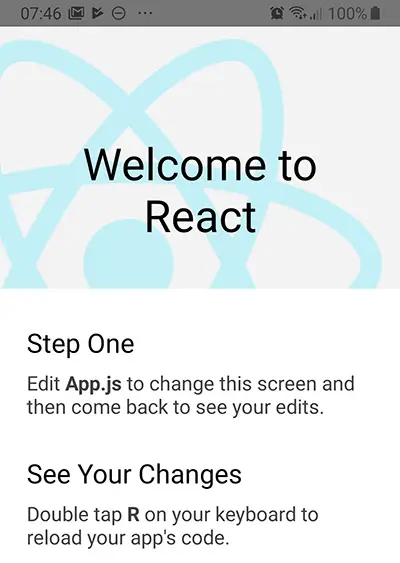
If you did everything correctly, the app should run with no issues and show the "Welcome to React" sample view on your emulator (or test phone) screen:
Right after that, switch back to the Firebase testing page and ensure that the app has been detected there as well.
If everything is OK you should be able to see the following green message:
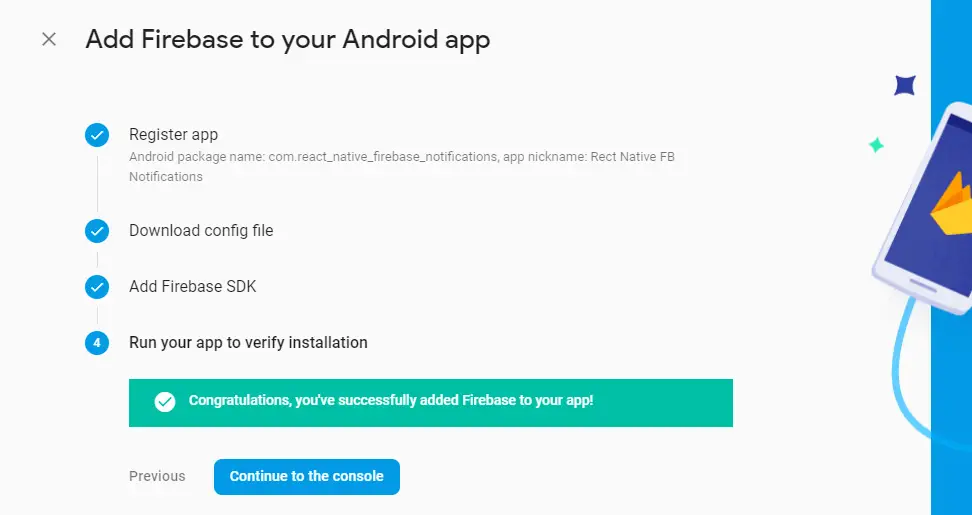
Our Firebase Android App is complete. Now we need to do the same with the iOS App.
Firebase iOS App
Creating the iOS app is rather similar to the Android process we've just dealt with.
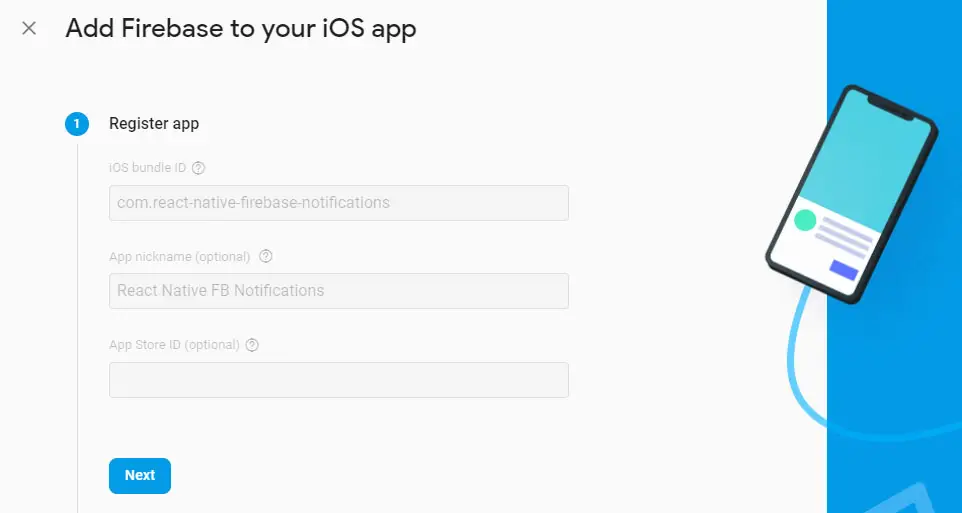
Go back to the project dashboard, then click the Add app button to add a new iOS app: click on the iOS logo when asked to choose a platform and then fill in the relevant values to the Add Firebase to your iOS app form, just like we did with the Android app.
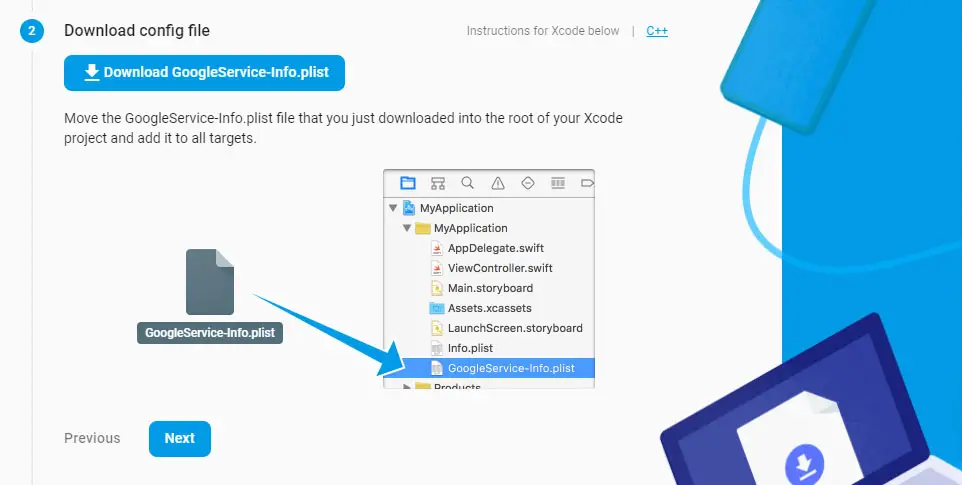
Once you've done, click Register App and then Next to continue to the step 2, wher e you'll be given the chance to download a GoogleService-info.plist file containing the required configuration to run Firebase on the iOS version of your React Native app: download and save it within the /ios/<app_name>/ folder of your React Native app, the same folder where the Info.plist file is.
If you use XCode, you can take the picture shown on the Firebase web page as a useful reference:
Again, the next two steps (3 and 4) can be skipped, as we already performed the mentioned tasks in the part 2 of this guide: for this reason, just click the Next button a couple times to enter into the Run your app to verify installation phase. This is basically a ping test that Firebase will do to verify that your app can connect to its API, thus ensuring that the SDK has been installed correctly.
As soon as the test runs, you will see a grey message saying that Firebase is trying to check for your app presence. Leave the web page open, switch to your Mac and run your React Native app in debug mode using the following React Native CLI console command from the app's root folder:
> react-native run-ios
Alternatively, if you want to force a specific iOS simulator, you can also use the --simulator flag in the following way:
> react-native run-ios --simulator "iPhone 7"
Conclusion
That's it! If everything went good, it means we've successfully created our Firebase project, the Android and iOS Firebase app, and tested our connection between them and our React Native app... meaning that we can already receive push notifications on our device(s)!
Now we need to deal with our React-Native UI in order to make our app actually able to receive push notifications.

Part 4 of 5: Implement the React Native UI


4th part coming soon?
Part 4 is out as well, as well as the GitHub project containing a working app developed using this tutorial parts 1-2-3-4.
I will eventually release Part 5 as well: however, part 4 is more than enough to perform a full push notification roundtrip, therefore there is no urgency anymore. :)
Hey man, good work with the tutorial, when is part 4 and 5 coming up ??
Where’s Part 4?
Part 4 is out as well, as well as the GitHub project containing a working app developed using this tutorial parts 1-2-3-4.
I will eventually release Part 5 as well: however, part 4 is more than enough to perform a full push notification roundtrip, therefore there is no urgency anymore. :)
Hi ! A really good post !
I want part 4 & 5 now ! ??
Part 4 is out as well, as well as the GitHub project containing a working app developed using this tutorial parts 1-2-3-4.
I will eventually release Part 5 as well: however, part 4 is more than enough to perform a full push notification roundtrip, therefore there is no urgency anymore. :)
where is part 4 and 5?
Part 4 is out as well, as well as the GitHub project containing a working app developed using this tutorial parts 1-2-3-4.
I will eventually release Part 5 as well: however, part 4 is more than enough to perform a full push notification roundtrip, therefore there is no urgency anymore. :)
Great posts man. Is part 4 getting released?
This week :)
come on.. cant wait
Part 4 is out as well, as well as the GitHub project containing a working app developed using this tutorial parts 1-2-3-4.
I will eventually release Part 5 as well: however, part 4 is more than enough to perform a full push notification roundtrip, therefore there is no urgency anymore. :)
Cool=)
Part 4 is out as well, as well as the GitHub project containing a working app developed using this tutorial parts 1-2-3-4.
I will eventually release Part 5 as well: however, part 4 is more than enough to perform a full push notification roundtrip, therefore there is no urgency anymore. :)
Really help full material. Please release part 4 and 5 asap as i need it in completing my project.
Part 4 is out as well, as well as the GitHub project containing a working app developed using this tutorial parts 1-2-3-4.
I will eventually release Part 5 as well: however, part 4 is more than enough to perform a full push notification roundtrip, therefore there is no urgency anymore. :)
I’ve got stuck in the following part:
Nothing is happing after that except the execution time is increasing.
Any kind of help will be appreciated.
Thanks in advance.
I’ve no idea, since that’s never happened to me: sorry about that :(
Have you checked your gradle and/or RN version? Are they identical to the sample GitHub project I attached to this guide?
Maybe some syntax errors in the google-services.json file? Permission issues?
No problem and thanks for your kind reply. It seems the following issue https://github.com/facebook/react-native/issues/26571
Although no solution works for me.