In this post we'll deal with one of the most undervalued and semi-unknown features of Internet Information Services, better known as IIS, the web server shipped with most Windows client and servers distributions - from Windows 95 to Windows 10 and Windows Server 2019: the IP and Domain Restrictions role service, which allows the system administrator to allow or deny access to the web server, web sites, folders, or files through various rules that can be configured for remote IP addresses or based on the domain name.
Such feature has been added since IIS 7.0, shipped with Windows Vista and Windows Server 2008, and is available since then... even if most administrator don't know it does exist. The reason for that is simple: it's not included in the default Windows Server installation, the one you get when you click "OK" various times without actually looking at the screen. Even if you choose to install IIS, the IP and Domain Restrictions option won't be enabled by default: you'll have to install it manually using the Server Manager by following the steps described below.
Installing
Luckily enough, installing the IP and Domain Restrictions role service feature is rather trivial:
- Open the Server Manager by selecting Start > Administrative Tools > Server Manager.
- On the next screen, select Role-based or feature-based, then select your server and click Next.
- Click the Add Role Services link to add the required role.
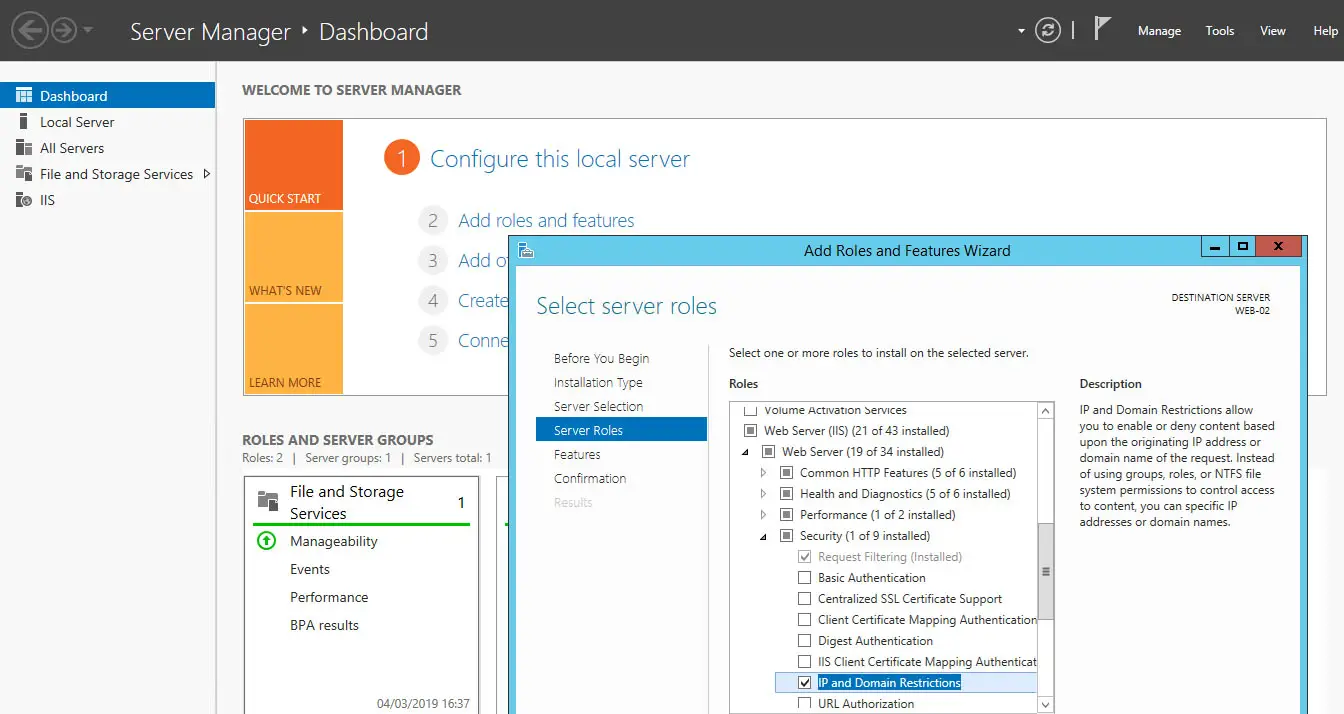
- From the Select Role Services screen, navigate to Web Server (IIS) > Web Server > Security.
- Check the IP and Domain Restrictions check box and click Next to continue.
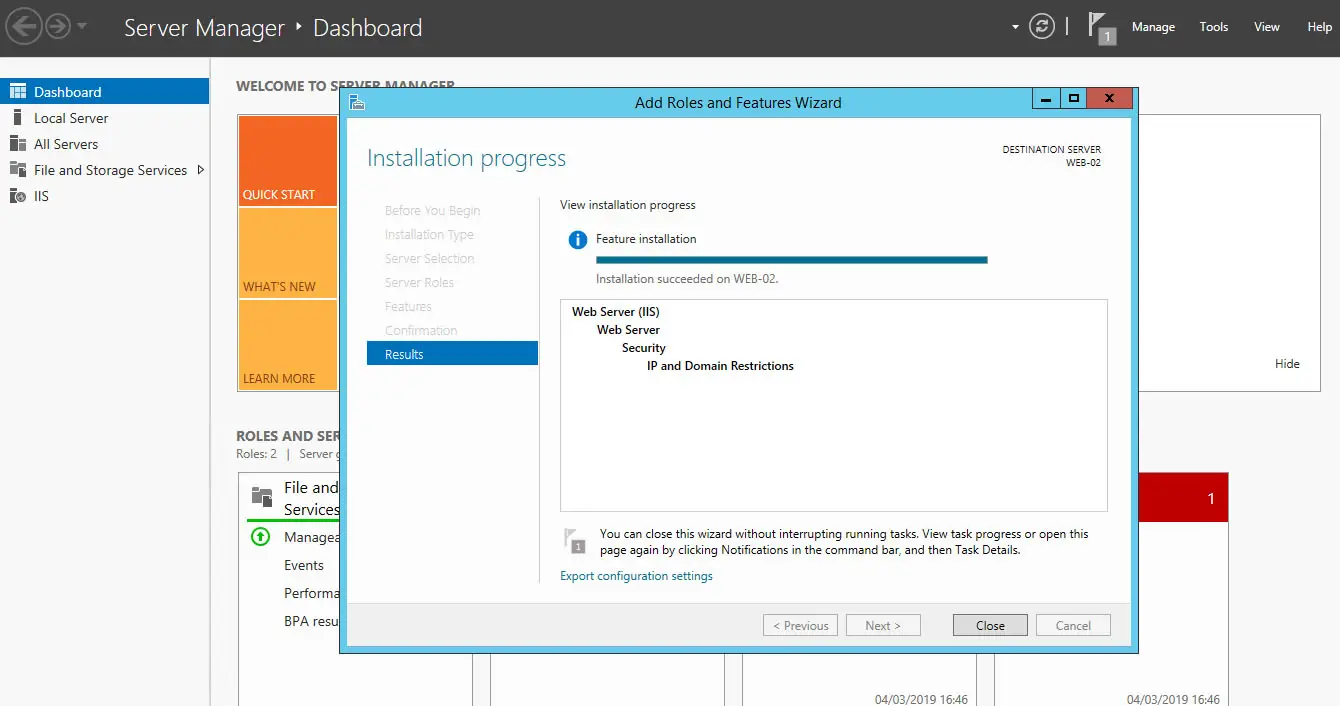
- From the Confirm Installation Selections screen, click Install to add the IP and Domain Restrictions role service.
Here are some screenshots depicting the selection & installation phases:
Configuring
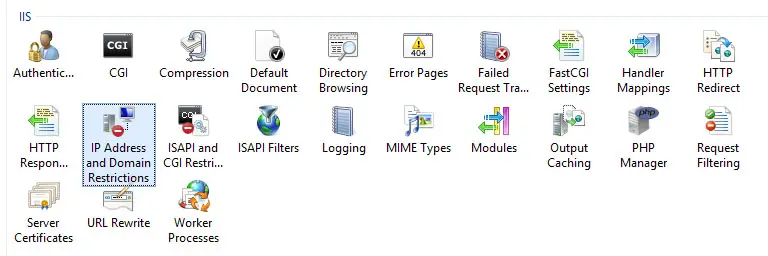
After adding the IP and Domain Restrictions role service, a new icon will be added to IIS Manager GUI interface: by clicking on such icon, you'll be able to configure IP and domain restrictions as shown below:
The configuration interface is quite straight-forward, and similar to all other IIS Manager services: you'll be able to add Allow Entries and/or Deny Entries, thus allowing or blocking specific IP addresses, IP address ranges, IP masks and even domain names.
Needless to say, you'll also be able to set a default behaviour for unspecified clients using the Edit Feature Settings link available on the right column:
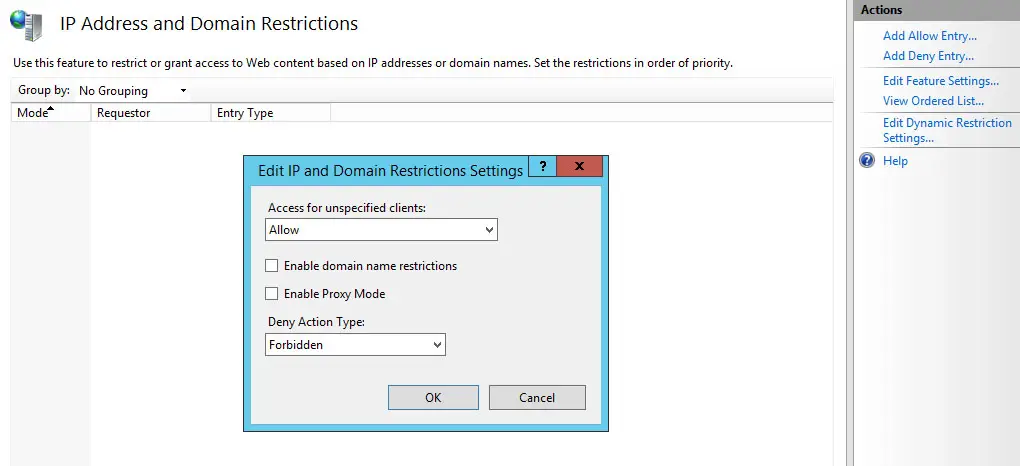
Also, keep in mind that - if your website is behind a reverse proxy - you might not be able to see the caller IP address unless the reverse proxy is properly configured to set it accordingly. If that's so, you'll just have to check the Enable Proxy Mode optional boolean attribute: such option, if checked, tells IIS to not only to block requests from a client IP that is seen by IIS, but also to block requests from IP addresses that are received in the x-forwarded-for HTTP header. This header enables you to identify the originating IP address of a client that connects through an HTTP proxy or load balancer: this is referred to as proxy mode.
Result
When a remote client that is not permitted access requests a resource and a deny rule is hit, the following errors will appear depending on the Deny Action Type rule specified through the Edit Feature Settings window:
403.6 - Forbidden: IP address of the client has been rejected
403.8 - DNS name of the client is rejected
The HTTP error will be also recorded within the Internet Information Services (IIS) logs.
Conclusion
That's it, at least for now: I definitely hope that this small tutorial guide will help many web administrators to selectively allow or block traffic on their web sites.
