Table of Contents
Providing ourselves with a SQL Managed Instance on the Azure Cloud Portal can be a great way to create, host and mantain SQL Databases in the cloud.
As we most likely already know, putting our DBMS on Azure gives us the chance to have our SQL Server workloads running as either a hosted infrastructure (IaaS) or a hosted service (PaaS): the first option is great if we want to handle the database maintenance tasks by ourselves - such as apply patches, take backups, and so on; the second option is preferable if we do want to delegate such operations to Azure. However, regardless of the chosen path, we're going to have a scalable database service with full redundancy and no single point of failure guarantees, plus a lot of other performance and data security benefits. The downsides, as we can easily guess, are mostly two: the additional cost and the fact that we're going to have our data located elsewhere, which can be a major issue in terms of privacy and data protection in certain scenarios.
In the first part of this guide we'll quickly summarize the main differences between the IaaS and PaaS approaches; right after that, we'll extensively explain how to configure a SQL Managed Instance (IaaS), leaving the PaaS alternative to another post that we'll be publishing within the next few weeks.
Introduction
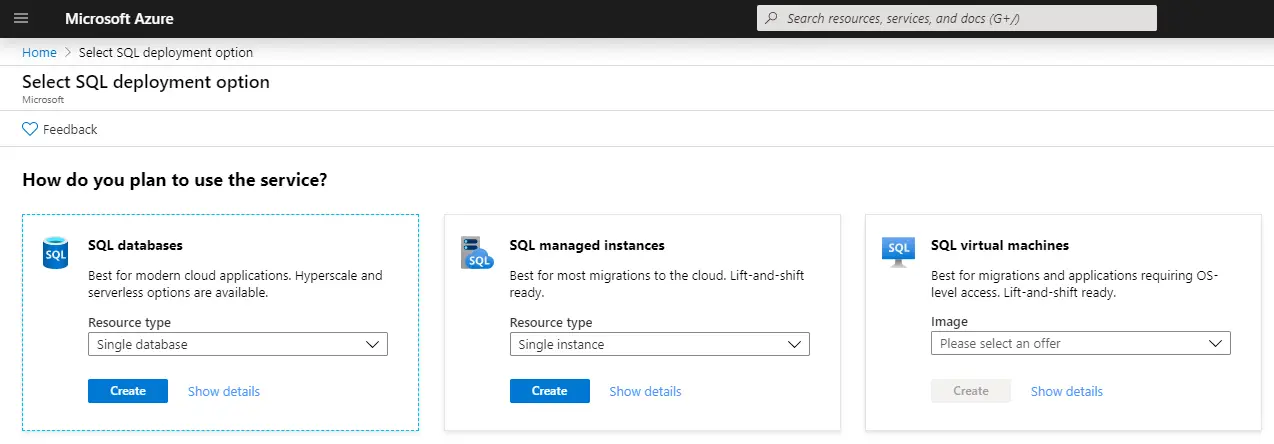
The SQL Managed Instance is one of the three main approaches available on Azure for hosting SQL databases: the other two options are SQL Databases and SQL Virtual Machines. As we can easily expect, all of these options have their pros and cons in terms of costs, performance, security, customization and complexity. Let's briefly summarize how each one of them works and their benefits:
- SQL Database: A fully-managed SQL database engine based on SQL Server Enterprise Edition. This option allows us to setup and manage one or more single relational databases hosted in the Azure cloud with a Platform-as-a-Service (PaaS) usage and billing model: more specifically, we can define it a Database-as-a-Service (DBaaS) approach. This option provides built-in high availability, intelligence, and management, hence being great for those who wants a versatile solution without the hassle of having to configure, manage and pay a whole server host.
- SQL Managed Instance: A dedicated SQL Managed Instance on Azure, a scalable database service providing near 100% compatibility with a standard SQL Server instance, featuring a Infrastructure as a Service (IaaS) usage and billing model. This option provides all of the PaaS benefits of the previous one (SQL Database) but adds some additional features and capabilities, such as: Linked Servers, Service Brokers, Database Mail, full Azure Virtual Network support, multiple databases with shared resources, and so on.
-
SQL Virtual Machine: A fully-managed SQL Server consisting of a Windows or Linux Virtual Machine with a SQL Server instance installed on top of it. This approach, which also adopts a Infrastructure as a Service (IaaS) usage and billing model, offer full administrative control over the whole SQL Server instance and the underlying OS, thus being the most complex and customizable one. The most significant difference from the other two options (SQL Database and SQL Managed Instance) is that SQL Server VMs also allow full control over the database engine: we can choose when to start maintenance/patching, change the recovery model, pause/start the service, and so on.
All of these options are good enough and, although very different in terms of overall costs, can be activated free of charge: SQL Database is arguably the cheapest one because it's free for 12 months, thanks to the trial subscription plan offered by Azure, as long as we keep its size under 250GB; either SQL Managed Instance and SQL Virtual Machine are rather expensive, since they both provide a virtualized IaaS, but they can be activated for free (at least for few weeks) with the 200€ provided by that same Azure trial subscription plan.
SQL Managed Instance
Let's see how we can setup a SQL Managed Instance.
Let's start by visiting the following URL:
Which will bring us to the web page that will allow us to create an Azure SQL Managed Instance:
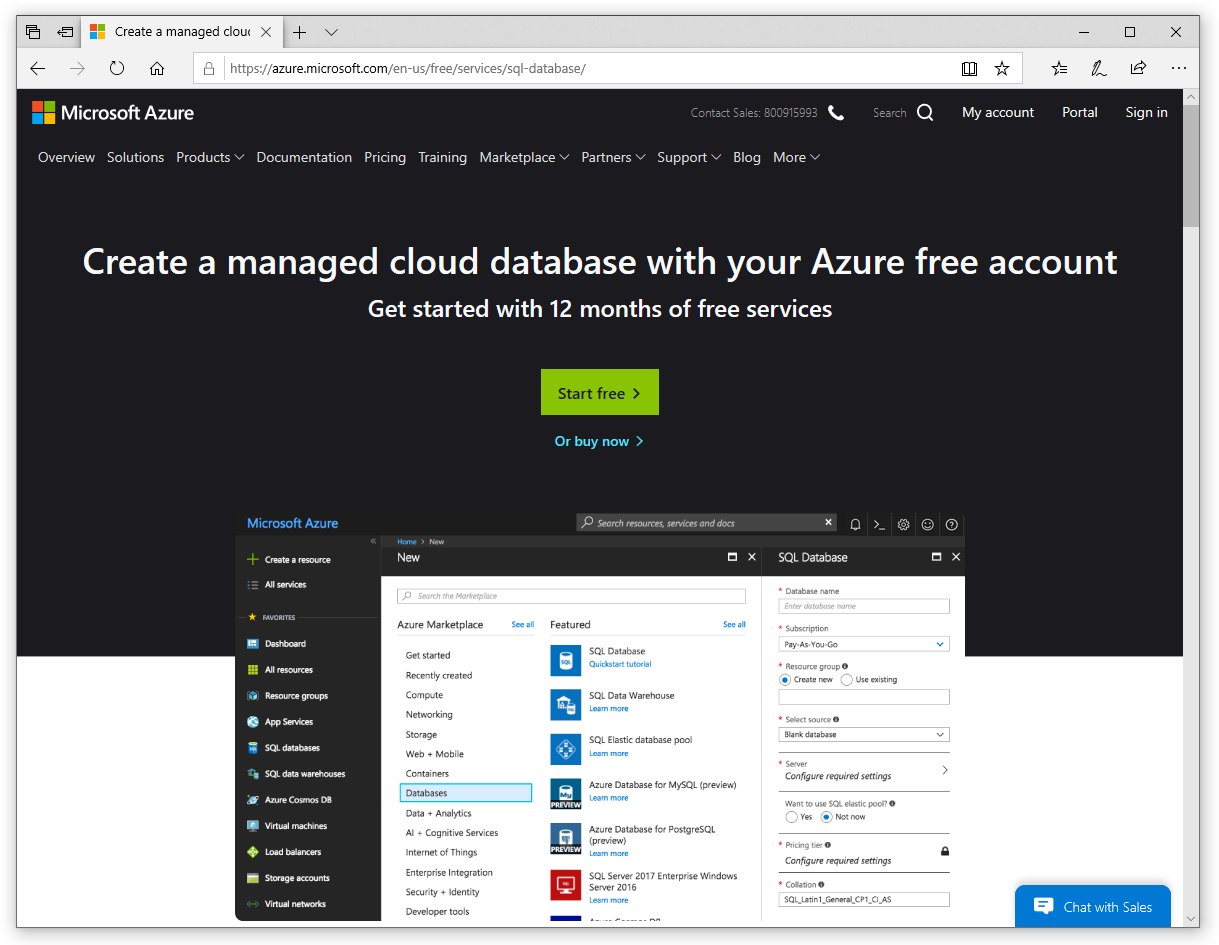
Click the Start free button and create a new account.
After a brief registration form (and/or login phase) you'll be redirected to the Azure portal.
It goes without saying that, if the account we've logged in with has already spent its free period or has an active paid subscription plan, we'll be gracefully bounced back:

Eventually, after having sorted everything out, we should be able to access the Azure portal (portal.azure.com) in all of its glory:
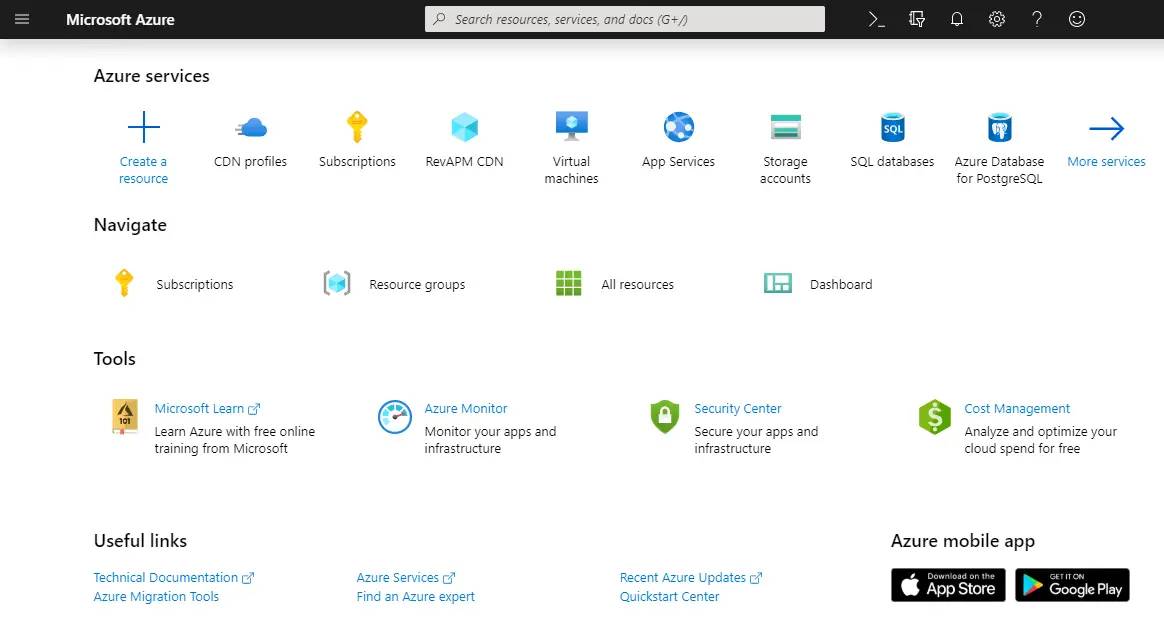
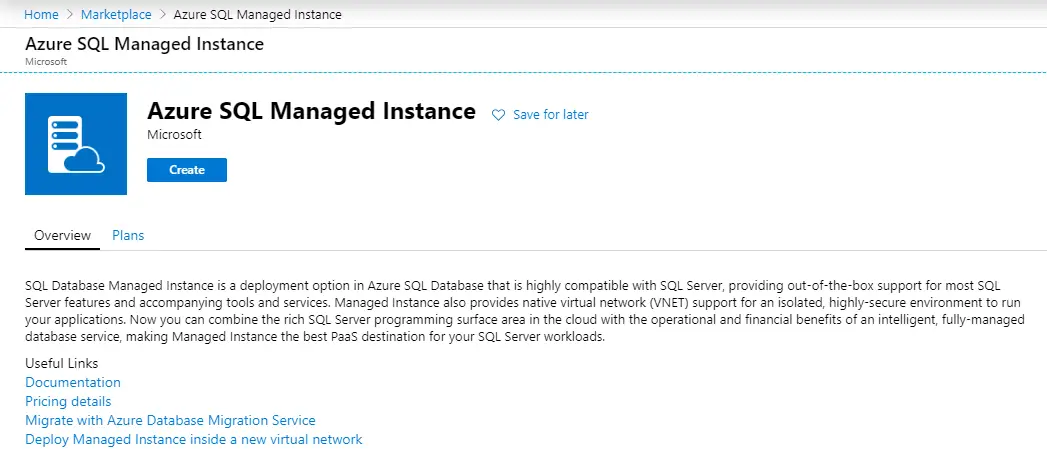
Once there, click to the Create a resource button to access the Azure Marketplace: search for an entry called Azure SQL Managed Instance, then click Create to add it.
During the process we'll be also asked to create our very first Azure Tenant (unless we already have one): that's basically a virtual organization that owns and manages a specific set of Microsoft cloud services. Tenants are identified by unique URIs with the following format: <TenantName>.onmicrosoft.com: just give it a suitable name and go ahead.
Configuring the Instance
As soon as we click the Create button we'll be asked to configure our SQL Managed Instance with a wizard-like interface splitted into the following tabs:
- Basics: Subscription type, instance name, admin username and password, service tier, and so on
- Networking: Network connectivity method and firewall rules
- Additional settings: Collation and Time Zone
- Review + Create: Review and confirm all of the above
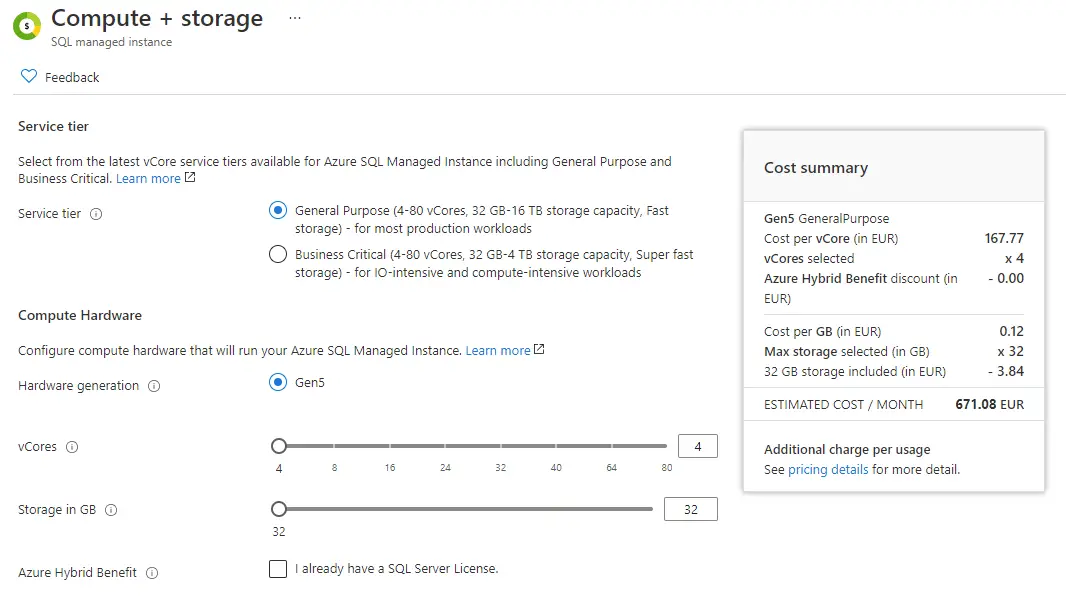
The default settings are fine for the most part: just be sure to select a service tier with enough capacity and hardware resources for the workload you reasonably expect: however, keep in mind that you can change it after deployment without issues. In our example, we've picked a General Purpose service tier with the minimum possible amount of vCores and storage:
Furthermore, be sure to enable external access from the Internet, to that we'll be able to connect to our Database from all our environments.
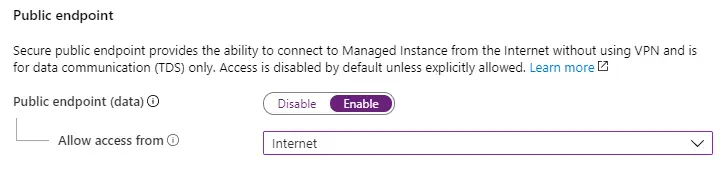
Wait a minute: isn't that a major security issue? What if our databases contains personal or sensitive data?
As a matter of fact, it actually is: allowing public access from the Internet is something we should always avoid, unless we're playing with open data for testing, demonstrative or tutorial purposes... Which is precisely what we're doing right now.
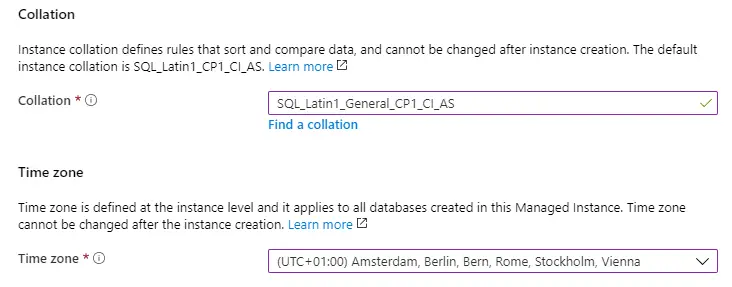
Also, be sure to select a collation and a timezone suitable to your language & country.
Once you've set up all of these options, go to the Review + Create table to check that everything has been properly set.
If everything looks good, click the Create button to start provisioning the managed instance.
The deployment task can take some minutes, therefore you'll have to be patient: once it's done, you'll be able to access the managed instance and configure it further, OR directly connect to it using the public IP address (screenshot below, near the top-right corner) that MS Azure will assign to it.
However, before connecting to the SQL Server, we should definitely spend a couple more minutes to understand how we can do that from any external machine (outside MS Azure) without giving up too much in terms of security.
Connecting to a SQL Managed Instance
Azure SQL Managed Instance provides a private endpoint to allow connectivity from inside its virtual network: if you need to connect to your SQL Managed Instance from within any MS Azure service - including Azure-hosted VMs, Web Applications published on App Services, and so on - this is the best option in terms of security, as it provides maximum isolation.
However, there are scenarios where you need to provide a public endpoint connection, for example when you need to connect to your SQL managed instance from external VMs or web farms: that's precisely why we've setup a public endpoint in the previous paragraph: since we've done that, MS Azure will make our SQL Managed Instance publicly accessible from the web.
It goes without saying that, should you go for the public endpoint route, you'll open your managed instance to external threats: for that very reason, you'll have to carefully configure the inbound connection rules to minimize the risk of unauthorized access to your data.
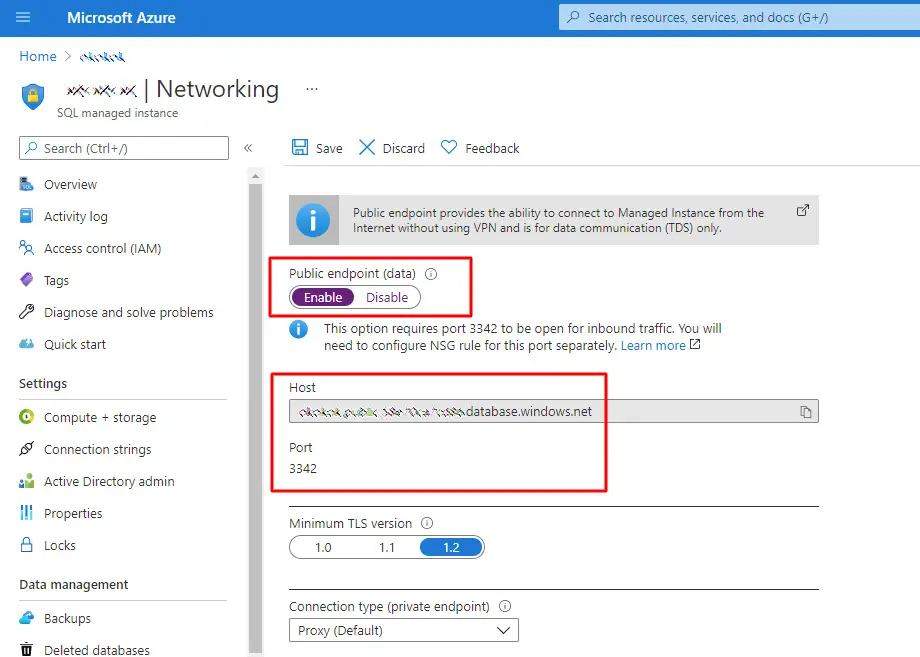
This task can be done by selecting the Security > Networking option from the left menu and properly configure the public endpoint, as well as retrieving the host name and TCP port.
Right after doing that, you need to allow public endpoint traffic on the managed instance's network security group (NSG). In order to do that, navigate to the Overview tab and select the Virtual network/subnet link, which will take you to the Virtual network configuration page.
Once there, select the Subnets tab on the left configuration pane, and take a look to the name of the SECURITY GROUP for your managed instance.
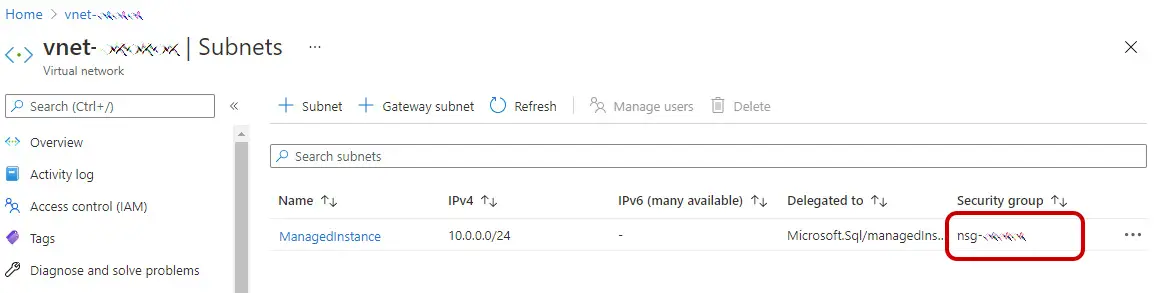
Go back to the Azure main dashboard and select Network Security Groups to find your NSG with that same name. Select it to go into that NSG configuration page: from there, select the Inbound security rules tab, and then Add a rule that has higher priority than the deny_all_inbound rule with the following settings:
| Source | Any IP address or Service tag | See below for details on this |
| Source port ranges | * | Leave this to * (any) as source ports are usually dynamically allocated and as such, unpredictable |
| Destination | Any | Leaving destination as Any to allow traffic into the managed instance subnet |
| Destination port ranges | 3342 | Scope destination port to 3342, which is the managed instance public TDS endpoint |
| Protocol | TCP | SQL Managed Instance uses TCP protocol for TDS |
| Action | Allow | Allow inbound traffic to managed instance through the public endpoint |
| Priority | 1000 | Make sure this rule is higher priority than the deny_all_inbound rule |
The most important setting in terms of security is the Source parameter: if the external VM or device or app that needs to connect to the SQL Managed Instance has a fixed IP address (or a suitable address range), it can be wise to put that IP address or netmask there instead of leaving Any, as it will limit potential threats from unauthorized third-party sources.
After having configured the inbound rule with the above settings, you can find the database connection string by going back to the SQL Managed Instance configuration page and select the Settings > Connection strings tab. Inside the connection string you will find the Managed Instance host name in the same <mi_name>.public.<dns_zone>.database.windows.net format we've seen before and the expected 3342 TCP port.
Conclusion
That's it, at least for now: we hope that this post will help both ASP.NET developers and System Administrators to create a SQL Managed Instance on MS Azure and connect to it from any external client, web application or virtual machine.
You can’t access a SQL managed instance privately the way you showed. You took a screen capture of a virtual machine, not the managed instance. There is no accessible IP address you can connect to directly and an Azure SQL Managed Instance doesn’t spin up a Virtual Machine that is managed in any way that other VMs are. Almost everything you explained about managed instances themselves are wrong, such as, it has no “native virtual network”, as you assign it a subnet for an existing vNet. Also, there is no “custom private IP addressing” with these. You get no visilibity into how the IPs for the subnet are assigned to the components. Managed instances inherently have private endpoints built into the solution that requires Azure DNS enabled on the vNET for internal control plane routing.
Hello there, thank you for your feedback: as a matter of fact the content was already amended a while ago, but for some strange reasons the outdated version was still in Cloudflare cache. I think we’ve managed to fix that now.