

In this article I’m going to explain how to effectively perform a SQL Server Data Migration to an Azure SQL (PaaS) instance. Since SQL Server provides various tools and features, you can do this migration process in various ways. Here are some of those ways:
- DMA (Data Migration Assistant)
- SQL Server Management Studio Deployment Wizard
- SQL Server to Azure SQL replication
After all consideration of the pros and cons of these three approaches, my choice is DMA (Data Migration Assistant). Because of, we can do it simple way with fewer problem issues in DMA migration process. Thus, Data Migration Assistant is argualy a better approach.
Now, I’m going to explain in detail of using the Microsoft Data Migration Assistant process.
Data Migration Assistant
DMA allows the migration process of (SQL server database) on-premises database to Azure SQL. DMA tools offer two types of projects called assessment and migration projects. The assessment project assists us to check and analyze supported and unsupported of a source database before migration. Also, provides a compatibility level check option which can influence the migration and provides suggestions about these compatibility level issues. Two features of DMA play a crucial part in the migration process.
- DMA explores compatibility issue which can block or stop migration.
- DMA explores and the current database features which are supported (partially) or unsupported by SQL Azure.
Sometimes, in the migration process of an on-premises database (SQL server database), some of its objects or features might not be supported by Azure SQL. In this case, the above two features are extremely useful for us to resolve the issues. In this situation, we can exploit the Data Migration Assistant.
1. Assessment Project Type
Now I’m going to migrate my sample AdventureWorks project database to Azure SQL database. First, I will run the Assessment project type to assess my on-premises database. Here are the steps to follow:
- Click the + in New tab.
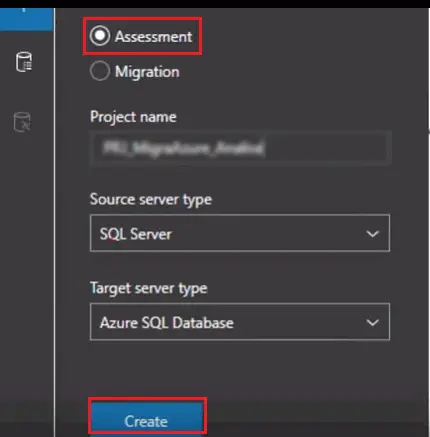
- Select the Assessment in project type.
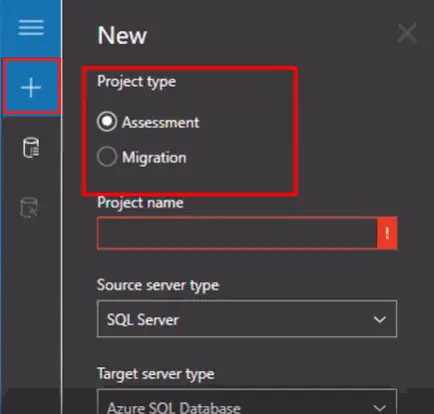
- First, give a name for your project. Then:
- In “Source service type” select the SQL server and
- In Target server type select the Azure SQL Database and then click on “Create.”
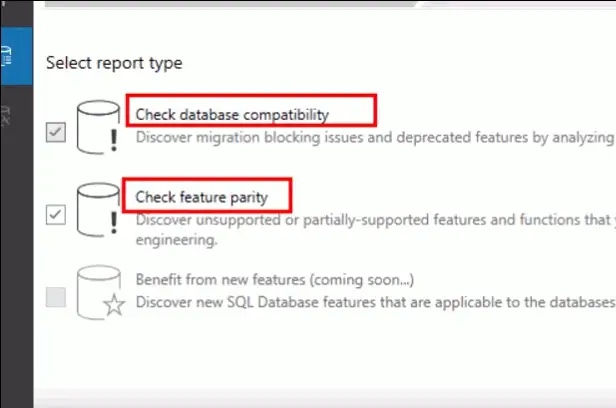
- select Check feature parity and Check database compatibility then click on “Next.”
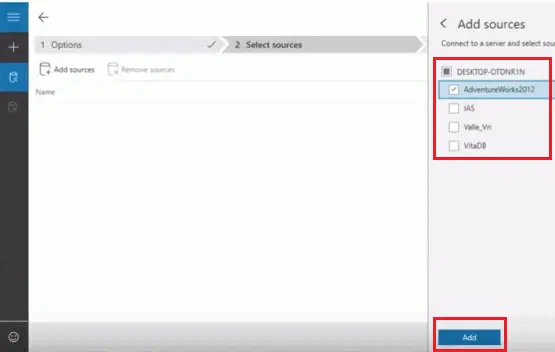
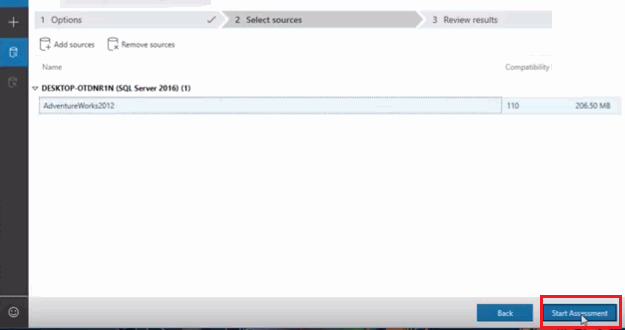
- Give server name, authentication type, and connection properties of the on-premises database server and then click on “Connect.”

- Select a database which you want to migrate and then click on “Add.”
- Then click on “Start Assesment.”
Then DMA shows partially-supported and unsupported features which you use on the on-premises server. ABased on your project, you have to fix issues.
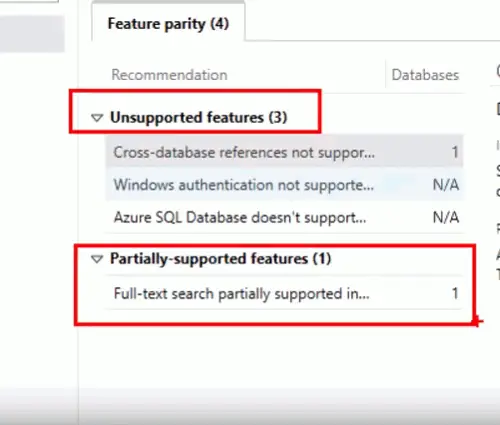
For my project database, DMA detects 3 unsupported features and 1 partially-supported feature.
Then select Compatibility issues, DMA provides some compatibility level issues. Here you can save these details by clicking on the “Export reports.”
2. Migration Project Type
Now, I’m going to show you the Migration from the on-premises database (SQL server database) to Azure SQL database.
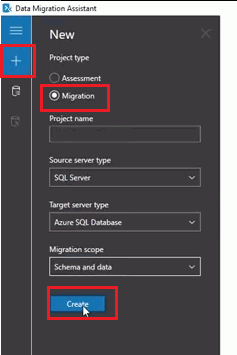
- First, click the + in New tab.
- Select the Migration in project type.
- In “Source service type” select the SQL server and
- In “Target server type” select the Azure SQL Database
- In Migration Scope” select schema and data and then click on “Create.”
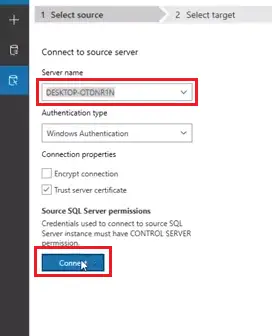
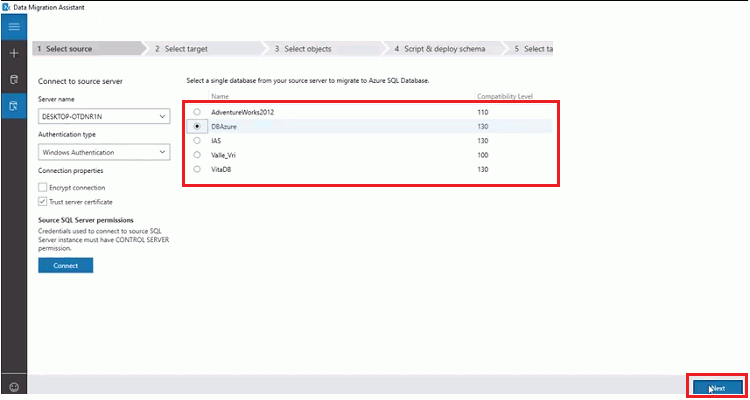
- Connect to source server - give server name and then click on “Connect.” Then it will show you the databases on the source server.
- Select a single database from your source server and then click on “Next.”
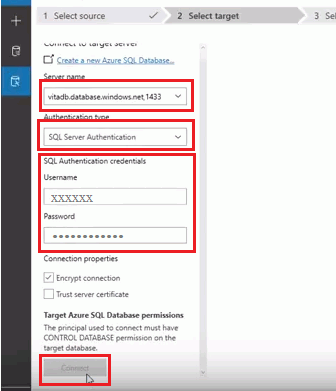
- Enter the details of the target server and SQL authentication credentials. Then click on “Connect.”
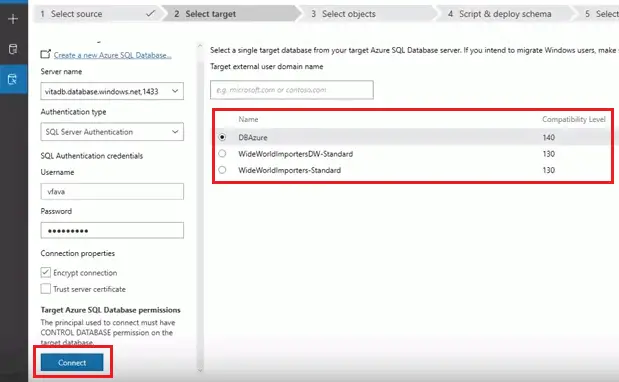
- It will show you the available Azure SQL databases on that Azure server. Select the database which you would like to migrate and click on “Next.” Here, you can see the sample Azure DB that I created for migrating. Then it will progress. The progress time depends on the database size.
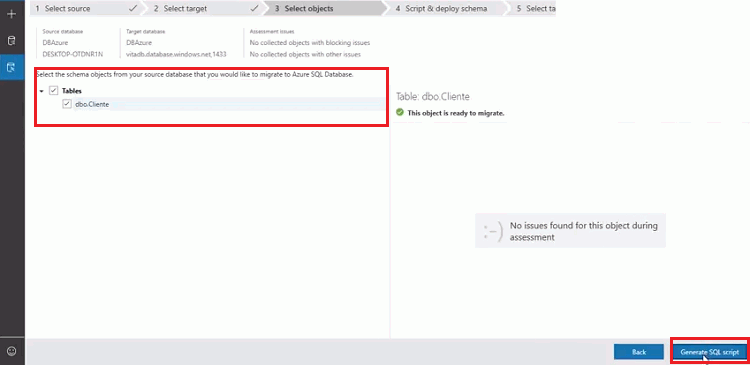
- Then it will show you the schema objects in your database source. Select the object to view any issues found for that object. In case if you found any issues, you have to remove that objects from the migration. If no issues found, select the schema objects which you want to migrate and click on “Generate SQL script.”
- Then it will show you the generated script. You can review the scripts and modify if required. Then Click on “Deploy Schema” to deploy the schema. This process takes based on the number of objects. For me, it’s completed in seconds.
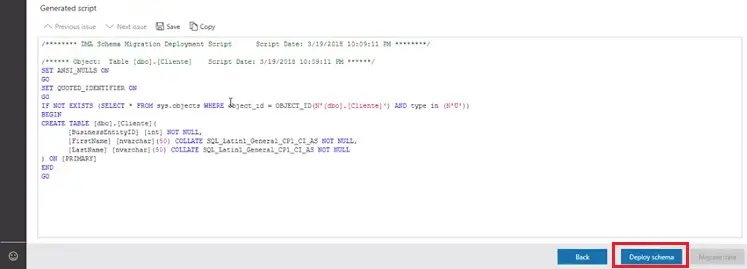
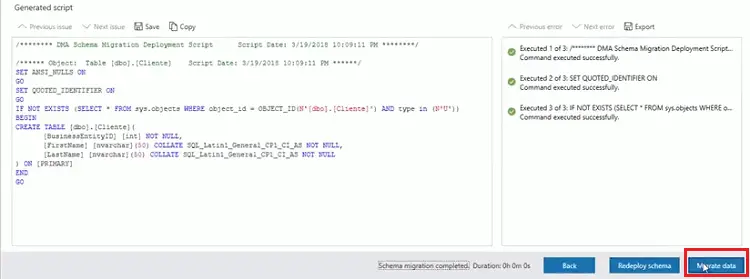
- After the process, you can see the status of schema deployment. click on "Migrate data."
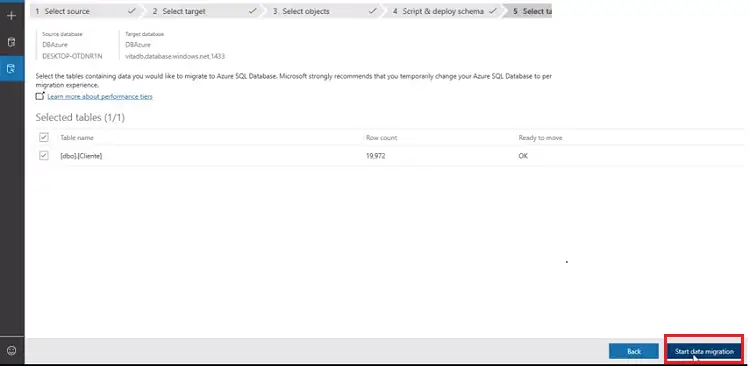
- Then it will show you the table details. Select the tables which you want to migrate and click on “Start data migration.”
- Again this process time also depends on the number of tables. Once the process completes, you can see the status of the data migration.
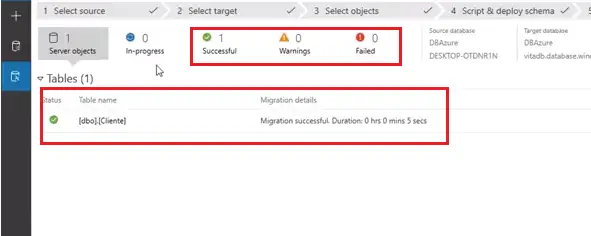
For confirmation of data migration, you can check the tables where the data was migrated to the Connected Azure SQL database.
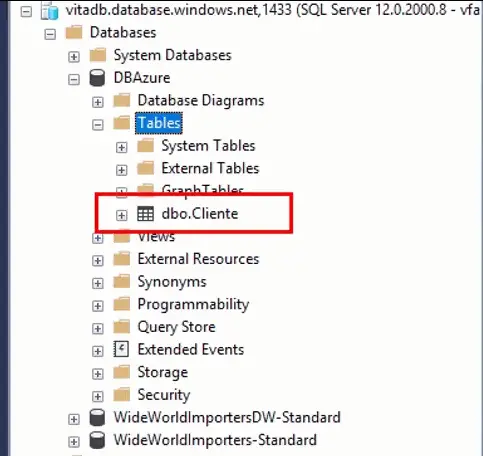
Here you can see my data is successfully migrated. I followed all migration steps by using the Data Migration Assistant.
